Are your functions overly distrustful? We’ll see just how the Null Object Pattern can restore a culture of trust and cut down flow control bugs on today’s episode of TL;DR, the JavaScript codecast series that teaches working web developers to craft exceptional software in 5 minutes a week.
Transcript
We just hit 100 subscribers, and I want to thank you so much for watching, sharing and subscribing! This series is based on problems faced in real-world consulting projects, so each episode is designed to teach powerful patterns that save you and your team time. But that takes a lot of time! Each 5–7 minute episode takes around 30 hours from inception to release.
So I want to ask you to consider supporting me on Patreon so I can keep crafting great content that helps you craft exceptional code. Think of it as a pay-what-you-like screencast subscription.
Alright, on to today’s pattern.
When each line of code has to defend against previous lines, we’re left with a tangle of branching and flow control constructs, like if…else and early returns. This is especially tricky for error handling code, which can turn an otherwise docile function into a flow control nightmare.
Today we’re working on authentication middleware that’s taken from a chapter in my book, Functional Design Patterns for Express.js. If you’re hopping into a Node backend and have loved the design-oriented approach we take on TL;DR, I encourage you to check it out.
We’re making authenticated HTTP requests to an Express backend and supplying a special token called a JSON Web Token. If you’re new to JWTs, think of them as the picture page of a passport: they encode details about the user, and are securely signed so the backend knows they’re authentic.
makeRequestWithToken('g00d_t0k3n');
// => '✅ 200: Welcome to the backend.'
makeRequestWithToken('3mpt1_t0k3n');
// => '🚫 401: Bad token.'
makeRequestWithToken('0ld_t0k3n');
// => 💥 TokenExpiredError: jwt expired
makeRequestWithToken('f@k3_t0k3n');
// => 💥 JsonWebTokenError: jwt malformed
As long as the token is valid, the backend lets us use any of its APIs. But if the token is missing some information, has expired, or has been tampered with, the backend halts the request in its tracks.
The function responsible for this guard behavior is a middleware function called checkToken():
let checkToken = (req, res, next) => {
  let payload = jwt.verify(req.token, 's3cr3t');

  if (payload && payload.user) {
    req.user = payload.user;
  } else {
    res.status(401).send('Bad token.');
    return;
  }

  next();
};
It tries to decode the contents of the JSON Web Token, called the payload. If the token is successfully decoded, it stores the user information on the request object and invokes next() to continue. But if the token is bad, it halts the request and immediately responds with a 401 Unauthorized status code.
But a lot of other things can go wrong. A client could supply an expired token, or they might tamper with it; in either case, the jwt.verify() function throws an exception. Right now, the checkToken() function is completely oblivious to these potential errors.
We should never allow a known exception to go uncaught, otherwise the backend’s response will just hang. So instead, we need to catch any JWT-related errors and respond with a 401 status code.
 let checkToken = (req, res, next) => {
-  let payload = jwt.verify(req.token, 's3cr3t');
+  let payload;
+  try {
+    payload = jwt.verify(req.token, 's3cr3t');
+  } catch (error) {
+    /* Suppress the error */
+  }

   if (payload && payload.user) {
     ...
 };
To do that, we can wrap try…catch around the verify() call. But as we learned in the last two episodes, an unqualified catch is almost always a bug. We must only catch error types we intend to handle. We’ll use an if…else statement to rethrow the error if it isn’t a TokenExpiredError or JsonWebTokenError.
let checkToken = (req, res, next) => {
  let payload;
  try {
    payload = jwt.verify(req.token, 's3cr3t');
  } catch (error) {
    if (error instanceof TokenExpiredError
     || error instanceof JsonWebTokenError) {
      /* Suppress the error */
    } else {
      throw error;
    }
  }

  if (payload && payload.user) {
    req.user = payload.user;
  } else {
    res.status(401).send('Bad token.');
    return;
  }

  next();
};
makeRequestWithToken('g00d_t0k3n');
// => '✅ 200: Welcome to the backend.'
makeRequestWithToken('3mpt1_t0k3n');
// => '🚫 401: Bad token.'
makeRequestWithToken('0ld_t0k3n');
// => '🚫 401: Bad token.'
makeRequestWithToken('f@k3_t0k3n');
// => '🚫 401: Bad token.'
This is the correct way to handle all these edge cases, but now checkToken() is swimming in flow control constructs: early returns, try…catch, throw, and an unhealthy dose of if…else statements too. And sadly, this style is typical of most popular middleware libraries.
Each line of code is constantly on guard, as though it can’t trust the lines before it. So how do we nuke these flow control constructs?
Last episode we derived a helper called swallow() that could help. swallow() is a higher-order function that runs some code that could potentially blow up. If it does, it suppresses the error and instead returns the result of another function.
let swallow = (type) => (fail) => (fn) => (...args) => {
  try {
    return fn(...args);
  } catch (error) {
    if (!(error instanceof type)) { throw error; }
    return fail(error);
  }
};

let safeFindBlog = swallow(NotFound)(
  () => 'Missing blog'
)(unsafeFindBlog);

unsafeFindBlog({ id: 5 });
// => { title: 'I 😍 JS' }
unsafeFindBlog({ id: 100 });
// => 💥 NotFound
safeFindBlog({ id: 100 });
// => 'Missing blog'
Let’s try using swallow() in place of the try…catch and if…else statements. If jwt.verify() throws a TokenExpiredError, we’ll catch it and instead return null to make it mirror the old behavior.
let checkToken = (req, res, next) => {
  let payload =
    swallow(TokenExpiredError)(
      () => null
    )(
      () => jwt.verify(req.token, 's3cr3t')
    )();

  if (payload && payload.user) {
    ...
};
Since swallow() is a higher-order function, we can also catch a JsonWebTokenError by composing it with another swallow().
 let checkToken = (req, res, next) => {
   let payload =
+    swallow(JsonWebTokenError)(
+      () => null
+    )(
       swallow(TokenExpiredError)(
         () => null
       )(
         () => jwt.verify(req.token, 's3cr3t')
+      )
     )();

   if (payload && payload.user) {
     ...
 };
This is horrible to read, but it behaves correctly and removed several flow control constructs. What about the remaining conditionals? It would help if we could go ahead and destructure the payload’s user property. Then the following code could be less defensive about the shape of payload.
Well if a TokenExpiredError is thrown, swallow() will return null, which isn’t an object and can’t be destructured. So what if instead of returning null, we returned a benign value that has the shape of a valid payload, such as an object with a user property? Then even if an exception is thrown, we can be sure that the payload will have the right shape.
 let checkToken = (req, res, next) => {
-  let payload =
+  let { user } =
     swallow(JsonWebTokenError)(
-      () => null
+      () => ({ user: null })
     )(
       swallow(TokenExpiredError)(
-        () => null
+        () => ({ user: null })
       )(
         () => jwt.verify(req.token, 's3cr3t')
       )
     )();

-  if (payload && payload.user) {
+  if (user) {
-    req.user = payload.user;
+    req.user = user;
   } else {
     ...
 };
By substituting a benign value as early as possible, we don’t have to be defensive later on. In Object-Oriented Programming, this benign value is called a Null Object. It’s often a subclass of the expected object type, and should respond to the same messages.
class User {
  constructor({ id, name, email }) {
    this.name = name;
    this.email = email;
    this.id = id || generateId();
  }
}

class NullUser extends User {
  constructor() {
    super({
      id: '00000000',
      name: 'NullUser',
      email: '[email protected]'
    });
  }
}
Since we’re taking a more functional approach, we won’t create a Null Object class, but we can still lift this Null Object into a variable called nullPayload to better communicate intent.
let nullPayload = { user: null };
I use this pattern so often, I like to create a utility called rescueWith() that behaves exactly like swallow(), except that we don’t need the extra function wrapping around the nullPayload.
let rescueWith = (type) => (fallback) =>
  swallow(type)(() => fallback);

let checkToken = (req, res, next) => {
  let { user } =
    rescueWith(JsonWebTokenError)(nullPayload)(
      rescueWith(TokenExpiredError)(nullPayload)(
        () => jwt.verify(req.token, 's3cr3t')
      )
    )();

  if (user) {
    ...
};
That helps cut down the syntactic noise, and once we move the arguments for jwt.verify() to the end:
let checkToken = (req, res, next) => {
  let { user } =
    rescueWith(JsonWebTokenError)(nullPayload)(
      rescueWith(TokenExpiredError)(nullPayload)(
        jwt.verify
      )
    )(req.token, 's3cr3t');

  if (user) {
    ...
We now see the entire function can be extracted from checkToken() altogether! Let’s call it safeVerifyJWT since it works exactly like jwt.verify() but just replaces errors with a safe value.
let safeVerifyJWT =
  rescueWith(JsonWebTokenError)(nullPayload)(
    rescueWith(TokenExpiredError)(nullPayload)(
      jwt.verify
    )
  );

let checkToken = (req, res, next) => {
  let { user } = safeVerifyJWT(req.token, 's3cr3t');

  if (user) {
    ...
Finally, let’s whip out our compose() helper to remove the nesting.
let safeVerifyJWT = compose(
  rescueWith(JsonWebTokenError)(nullPayload),
  rescueWith(TokenExpiredError)(nullPayload),
)(jwt.verify);
This refactor has helped us discover the boundary we should have seen all along: all that try…catch and if…else nonsense was just about making a version of jwt.verify() that behaved a little differently — just the sort of thing higher-order functions do so well.
And now checkToken() is back to focusing on the naive happy path. With all the noise out of the way, we can confidently reason that next() will only be called if there’s a user, so we can move it into the if clause and eliminate the early return in the else. This code now has zero flow control constructs!
 let checkToken = (req, res, next) => {
   let { user } = safeVerifyJWT(req.token, 's3cr3t');

   if (user) {
     req.user = user;
+    next();
   } else {
     res.status(401).send('Bad token.');
-    return;
   }

-  next();
 };
Optionally, we can even rewrite the remaining if…else statement into a ternary expression to prohibit any flow control constructs at all. But whether or not you use the ternary, the final checkToken() function reads nicely thanks to small, well-behaved functions and a predictable flow.
let nullPayload = { user: null };

let safeVerifyJWT = compose(
  rescueWith(JsonWebTokenError)(nullPayload),
  rescueWith(TokenExpiredError)(nullPayload),
)(jwt.verify);

let checkToken = (req, res, next) => {
  let { user } = safeVerifyJWT(req.token, 's3cr3t');

  return user
    ? (req.user = user, next())
    : res.status(401).send('Bad token.');
};
We’ve been building up to this refactor for a few episodes, but by letting things get ugly instead of skipping directly to rescueWith(), we saw how composition always wins in the end — even if the process seems to produce more code.
And that journey helped us identify and solve the underlying problem: trust. Each line of code was defensive because it couldn’t safely trust the results of lines before it. With this variation of the Null Object Pattern, we replaced edge cases with benign values. Once we did that, the boundaries became detangled so we could extract a safe version of jwt.verify().
Trust is a powerful refactoring tool. Today, look for try…catch statements, followed by if…else statements, and use the Null Object Pattern and rescueWith() to restore a culture of trust.
That’s it for today! If you loved today’s episode, please consider supporting the channel on Patreon. Want to keep leveling up your craft? Don’t forget to subscribe to the channel for more rapid codecasts on design patterns, refactoring and development approaches.
]]>
How do you handle runtime errors without a mess of try…catch and if…else statements? Let’s see how higher-order functions and composition can help on today’s episode of TL;DR, the JavaScript codecast series that teaches working web developers to craft exceptional software in 5 minutes a week.
Transcript
Last episode we saw how Custom Errors can often make our code worse, but Custom Exceptions can help by allowing intermediary functions to focus only on the feature’s happy path. If you’re just now joining us, hop back to the previous episode on Custom Exceptions.
Exceptions are useful when they eliminate if…else statements from calling functions, but at some point an Exception needs to be caught and handled, and that’s where the try…catch statement tends to make a mess of things.
Today we’re continuing to refactor a tiny chatbot we started a few episodes ago that helps outdoor enthusiasts find great trails to hike.
let chatbot = (message) => {
  return viewHike(message);
};

chatbot('view hike mirror lake');
// => 'Details about <mirror lake>'
chatbot('view hike lost lake');
// => 💥 NotFound: lost lake
chatbot('show hike blue ridge');
// => 💥 ValidationError: show hike blue ridge
Like last time, our chatbot only understands one command, view hike. Most of the time this command replies with details about the hike, but when users ask for a hike that isn’t in the database or their syntax is a bit off, the viewHike() function will throw a custom exception like a NotFound error or a ValidationError.
In either case, the chatbot shouldn’t blow up and stop running, so we started by wrapping a try…catch statement around the problematic code.
let chatbot = (message) => {
  try {
    return viewHIke(message);
  } catch (error) {
    return `No such hike.`;
  }
};

chatbot('view hike mirror lake');
// => 'No such hike.'
chatbot('view hike lost lake');
// => 'No such hike.'
chatbot('show hike blue ridge');
// => 'No such hike.'
But we quickly realized that every use of try…catch takes a substantial amount of boilerplate to keep from introducing a catch-all bug, like accidentally suppressing a ReferenceError.
To make sure we only rescued a particular error type, we introduced a simple utility called rescue(): a guard clause which rethrows the error if the type differs from what we intended to catch.
let chatbot = (message) => {
  try {
    return viewHIke(message);
  } catch (error) {
    rescue(error, NotFound);
    return `No such hike.`;
  }
};

chatbot('view hike mirror lake');
// => 💥 ReferenceError: viewHIke is not defined
 let chatbot = (message) => {
   try {
-   return viewHIke(message);
+   return viewHike(message);
   } catch (error) {
     rescue(error, NotFound);
     return `No such hike.`;
   }
 };
chatbot('view hike mirror lake');
// => 'Details about <mirror lake>'
chatbot('view hike lost lake');
// => 'No such hike.'
chatbot('show hike blue ridge');
// => 💥 ValidationError: show hike blue ridge
The problem with rescue() is that it only helps us catch one type of error at a time. So how do we handle both a NotFound error and ValidationError? We could make the rescue() function accept multiple error types, but then we couldn’t customize the fallback message based on the error type.
So do we have to give up the rescue() utility altogether and use cascading if…else statements to uniquely handle different error types? Maybe not if we factor a little further.
Our remaining try…catch boilerplate is starting to turn into an obvious pattern: if we were to reuse this try…catch in another part of the codebase, all that changes is the function to invoke, what type of error to rescue, and what to return if there is an error.
Let’s extract this formula into a function called swallow(), which takes the error type to swallow, a fallback function, and a function that will potentially throw an error.
let swallow = (type, fail, fn) => {
  try {
    return fn();
  } catch (error) {
    rescue(error, type);
    return fail(error);
  }
};
Now we’ll use swallow() to create a new version of viewHike() that is safe from NotFound errors.
let safeViewHike = (message) =>
  swallow(NotFound, () => `No such hike.`,
    () => viewHike(message)
  )
;

let chatbot = safeViewHike;
It seems to work as before! But this code is still pretty verbose, and some might argue it’s more cryptic than simply writing a try…catch with cascading if…else statements. Well, if we just change the signature of swallow() a bit to take advantage of currying, we can eliminate a lot of the extra function calls and argument gathering.
-let swallow = (type, fail, fn) => {
+let swallow = (type) => (fail) => (fn) => (...args) => {
   try {
-    return fn();
+    return fn(...args);
   } catch (error) {
     rescue(error, type);
     return fail(error);
   }
 };
let safeViewHike =
  swallow(NotFound)(() => `No such hike.`)(
    viewHike
  );
Whoah, look at swallow() now! It’s a Higher-Order Function: it takes in an unsafe function that throws a particular kind of error, and returns a safe version of the function.
Because swallow() returns a function that is safe from the NotFound error type, there’s no reason we can’t pass that function into swallow() again to make it safe from a ValidationError too!
let safeViewHike =
  swallow(ValidationError)(() => `Invalid format.`)(
    swallow(NotFound)(() => `No such hike.`)(
      viewHike
    )
  );
chatbot('view hike mirror lake');
// => 'Details about <mirror lake>'
chatbot('view hike lost lake');
// => 'No such hike.'
chatbot('show hike blue ridge');
// => 'Invalid format.'
That nesting is a bit nasty, but this is just the sort of thing the compose() utility is for:
let compose = (...fns) => x => fns.reduceRight((v, f) => f(v), x);
Instead of nesting swallow()s inside each other, we can list them out from top to bottom and feed the original viewHike() function at the very end. It works exactly the same way as manually feeding the results of each swallow() into the other, but it’s much easier to read and maintain.
let safeViewHike = compose(
  swallow(ValidationError)(() => `Invalid format.`),
  swallow(NotFound)(() => `No such hike.`),
)(viewHike);
This style of creating functions without first gathering and passing around all their arguments is called Point-free style, and it’s a big part of what makes functional programming so elegant.
It took us some time to arrive at this design, and many of the intermediate steps seemed a lot worse off than just using try…catch. But just like the Enforcer pattern we covered in an earlier episode, the best way to combine behaviors is through composition. Rather than cascading if-else statements, complex multiple error handling logic, or experimental catch syntax, we handled two kinds of errors through composition.
If you aren’t already in love with function composition, hang tight until the next episode: we’ll use error composition to put a functional twist on a popular Object-Oriented Programming pattern called the Null Object Pattern.
Today, look for try…catch statements in your codebase, and break down the parent function until you can replace the try…catch altogether with swallow(). And if you need to handle multiple error types, just layer them with compose().
That’s it for today. Want to keep leveling up your craft? Don’t forget to subscribe to the channel for more rapid codecasts on design patterns, refactoring and development approaches.
]]>
Do you get spooked by runtime errors? They can be a pain to deal with, but we’ll see just how much solid error handling strategies can help in our crusade against if…else statements on today’s episode of TL;DR, the JavaScript codecast series that teaches working web developers to craft exceptional software in 5 minutes a week.
Transcript
When you invoke a function, what might happen? Most of the time we get back a simple return value, but there’s another kind of result a function can produce: an Error.
An Error typically makes us think we did something wrong, but errors are just another feedback mechanism for a program, and unlike returning a value, throwing an Error has a peculiar superpower: it automatically propagates up the caller stack — interrupting the caller functions as it propagates — until it’s caught. This propagation behavior makes throw and try…catch statements a powerful control flow construct.
But handling errors correctly can quickly turn elegant functions into a hot mess of try…catch statements and nested if…else statements — exactly the sort of thing we’ve been obliterating in the last few episodes.
Today we’re working on a tiny version of the chatbot we started a couple episodes back that helps outdoor enthusiasts find great trails to hike.
let chatbot = (message) => {
  return viewHike(message);
};

chatbot('view hike mirror lake');
// => 'Details about <mirror lake>'
chatbot('view hike lost lake');
// => 💥 NotFound: lost lake
chatbot('show hike blue ridge');
// => 💥 ValidationError: show hike blue ridge
We’ve cut down the chatbot code from the last couple episodes: it only understands one command, view hike, which shows details about a hike. But sometimes users ask for a hike that isn’t in the database or their syntax is a bit off. To simulate these edge cases, the viewHike() function uses a few custom error types:
class NotFound extends Error {
  constructor(message) {
    super(message);
    this.name = 'NotFound';
  }
}

class ValidationError extends Error {
  constructor(message) {
    super(message);
    this.name = 'ValidationError';
  }
}
viewHike() throws a NotFound error if the hike has the word “lost”, and a ValidationError if the format of the message is off.
let viewHike = (message) => {
  let match = /^view hike (.+)$/.exec(message);
  let hike = match && match[1];

  return (
    !hike ?
      raise(new ValidationError(message))
  : hike.includes('lost') ?
      raise(new NotFound(hike))
  :
      `Details about <${hike}>`
  );
};
Like return and continue, throw is a statement, so to use it in a nested ternary, we wrote a simple helper called raise().
let raise = (error) => { throw error; };
There’s a stage 2 proposal for an expression-friendly version of throw in the works, but until it lands it’s easy enough to make our own. So all told, the viewHike() function can result in one of two things: a return value, or a thrown Error.
Our chatbot is terse, but it already has some issues. We definitely don’t want the chatbot to blow up and stop running if a NotFound error is thrown, so let’s wrap the call with a try…catch statement to instead return a safe fallback message:
let chatbot = (message) => {
  try {
    return viewHIke(message);
  } catch (error) {
    return `No such hike.`;
  }
};

chatbot('view hike mirror lake');
// => 'No such hike.'
chatbot('view hike lost lake');
// => 'No such hike.'
chatbot('show hike blue ridge');
// => 'No such hike.'
Wait, why is our chatbot always responding with “No such hike” now? That first command definitely worked before. Let’s comment out the try…catch statement to see what’s happening.
let chatbot = (message) => {
  // try {
    return viewHIke(message);
  // } catch (error) {
  //   return `No such hike.`;
  // }
};

chatbot('view hike mirror lake');
// => 💥 ReferenceError: viewHIke is not defined
chatbot('view hike lost lake');
// =>
chatbot('show hike blue ridge');
// =>
It looks like we were swallowing a ReferenceError. Well that would be a horrible bug to deploy to production!
We just made the cardinal mistake of error handling: a catch all. The try…catch statement will swallow any error — including errors we didn’t mean to catch.
It may sound obvious now, but just about any open source framework you’ve used probably has a catch-all bug in the codebase, from frontend frameworks like Ember.js to backend libraries like Passport and Jekyll. A catch-all ranks in the top 5 most frustrating bugs a library can make because it suppresses important errors unrelated to the library that the developer would otherwise see in the logs.
So it’s up to us to whitelist the type of error we want to handle, and otherwise rethrow it. Since we made custom error subclasses, we can use the instanceof operator to guarantee we’re catching an error we can handle. Otherwise, we’ll rethrow it.
let chatbot = (message) => {
  try {
    return viewHike(message);
  } catch (error) {
    if (error instanceof NotFound) {
      return `No such hike.`;
    } else {
      throw error;
    }
  }
};

chatbot('view hike mirror lake');
// => 'Details about <mirror lake>'
chatbot('view hike lost lake');
// => 'No such hike.'
chatbot('show hike blue ridge');
// => 💥 ValidationError: show hike blue ridge
To rescue a ValidationError, we add another else-if case.
 let chatbot = (message) => {
   try {
     return viewHike(message);
   } catch (error) {
     if (error instanceof NotFound) {
       return `No such hike.`;
+    } else if (error instanceof ValidationError) {
+      return `Invalid format.`;
     } else {
       throw error;
     }
   }
 };

 chatbot('show hike blue ridge');
 // => 'Invalid format.'
The chatbot is behaving well and not blowing up, but handling an error correctly looks awful. We definitely can’t leave these checks out, but a try…catch is a branching construct just like an if…else, so these are essentially nested, cascading if…else statements all over again. And we’ll have to repeat this boilerplate each time we need to handle an error correctly.
It really doesn’t seem like custom errors are making our code any better — in fact, it seems to be getting much worse!
That’s why you should never be too quick to sprinkle custom errors throughout your codebase. Because throw statements are fundamentally a control flow construct, they can often fight against everything we’ve been working towards in the previous episodes.
So when, if ever, should you use custom errors? Well, I prefer the alternative name “Custom Exceptions” because it tells us exactly when to use them: for unusual, exceptional cases that most of our codebase shouldn’t care about, like a NetworkError. These are cases that one or two functions in the codebase will handle with the same response: on the backend, a NotFound error thrown from any route should just generate a 404 response.
Used sparingly, custom exceptions can actually eliminate branching logic: since the rest of our functions can assume the happy path, they don’t need an if…else statement to check for an unusual return value, like a null check.
So a custom exception is worthwhile when it eliminates edge cases and if…else statements from calling functions, and throwing custom exceptions makes sense when the function would blow up anyway with a useless generic runtime error, like a TypeError.
Let’s see if we can find an error handling solution that cuts down if…else statements and common typos. Throwing an error triggers an early exit, even from a catch clause. Let’s shuffle the error checking code so it looks more like a guard clause:
let chatbot = (message) => {
  try {
    return viewHike(message);
  } catch (error) {
    if (error instanceof NotFound) {
      throw error;
    }
    return `No such hike.`;
  }
};
Now there’s nothing stopping us from extracting this entire guard clause into a function! Let’s call it rescue().
let rescue = (error, type) =>
  error instanceof type
    ? error
    : raise(error)
;
Now when using a try…catch, we just need to make sure we precede the catch code with rescue(). This behaves much better than what we started with, and it only added one line to our naive catch-all version.
let chatbot = (message) => {
  try {
    return viewHike(message);
  } catch (error) {
    rescue(error, NotFound);
    return `No such hike.`;
  }
};

chatbot('view hike mirror lake');
// => 'Details about <mirror lake>'
chatbot('view hike lost lake');
// => 'No such hike.'
chatbot('show hike blue ridge');
// => 💥 ValidationError: show hike blue ridge
Unfortunately, we can’t just stack invocations of rescue(), so how do we also handle a ValidationError? Hang tight and we’ll address this problem on the next episode of TL;DR. Till then, search for try…catch statements in your codebase and enforce good error handling practices with rescue().
That’s it for today. Want to keep leveling up your craft? Don’t forget to subscribe to the channel for more rapid codecasts on design patterns, refactoring and development approaches.
]]>
How can you cut down small if-else statements that recur across several functions? Let’s cover another pattern for nuking if-else statements on today’s episode of TL;DR, the JavaScript codecast series that teaches working web developers to craft exceptional software in 5 minutes a week.
Transcript
Over the past few episodes, we’ve been covering design patterns to help cut down the size and depth of if-else statements. If you’re new to this vendetta against if-else statements, hop back to the episode on nested ternaries to get up to speed.
Nested ternaries and the Router design pattern have helped us reduce the size and depth of cascading if-else statements, but we haven’t dealt with terse, non-cascading if-else statements that get copy-pasted across functions. These if-else statements often appear at the beginning of the function as a guard clause. They’re innocent and short, but like a weed they reproduce with each new feature, and the duplication is tricky to eradicate.
Today we’re continuing to work on a chatbot that helps outdoor enthusiasts find great trails to hike. This chatbot can respond to simple text commands, like list hikes, add hike and delete hike. If it doesn’t understand the command, it replies with a fallback message.
responder('list hikes');
// => 'Lost Lake, Canyon Creek Meadows'
responder('add hike Mirror Lake');
// => 'Added Mirror Lake!'
responder('delete hike Mirror Lake');
// => 'Removed Mirror Lake!'
responder('where is Mirror Lake');
// => "Sorry, I don't understand."
The code is a few steps forward from what we had last time: the responder function still follows the Router pattern, but we lifted the individual routes into functions to make the list of responses easier to read.
let hikes = [
  'Lost Lake',
  'Canyon Creek Meadows',
];

let listHikes = () =>
  hikes.join(', ');

let addHike = ([hike]) => {
  hikes.push(hike);
  return `Added ${hike}!`;
};

let deleteHike = ([hike]) => {
  hikes.splice(hikes.indexOf(hike), 1);
  return `Removed ${hike}!`;
};

let fallback = () =>
  `Sorry, I don't understand.`;

let responses = [
  { command: /^list hikes$/,
    response: listHikes },
  { command: /^add hike (.+)$/,
    response: addHike },
  { command: /^delete hike (.+)$/,
    response: deleteHike },
  { command: /^(.*)$/,
    response: fallback },
];

let responder = (message) => {
  let { command, response } = responses
    .find(({ command, response }) =>
      command.test(message)
    );
  return response(
    command.exec(message).slice(1)
  );
};
The responder function searches through the list of responses for a command that matches the chat message, then invokes the corresponding response function.
let responder = (message) => {
  let { command, response } = responses
    .find(({ command, response }) =>
      command.test(message)
    );
  return response(
    command.exec(message).slice(1)
  );
};
Today, we want to enforce that the add hike and delete hike commands are executed with the word “sudo” to prevent any accidental changes. Only some commands need sudo, and if the user forgets sudo, we want to provide feedback. So we can’t just add the word “sudo” directly to the regular expressions.
responder('list hikes');
// => 'Lost Lake, Canyon Creek Meadows'
responder('sudo add hike Mirror Lake');
// => "Sorry, I don't understand."
responder('sudo delete hike Mirror Lake');
// => "Sorry, I don't understand."
responder('where is Mirror Lake');
// => "Sorry, I don't understand."
We can make the regular expressions a little more lenient so the command is at least recognized:
 let responses = [
-  { command: /^list hikes$/,
+  { command: /list hikes$/,
   ...
-  { command: /^add hike (.+)$/,
+  { command: /add hike (.+)$/,
   ...
-  { command: /^delete hike (.+)$/,
+  { command: /delete hike (.+)$/,
   ...
 ];
But how should we enforce the use of sudo for these admin commands?
One tempting way to support a new, shared behavior like this is to add a new property to each response object: we’ll call it adminOnly.
 let responses = [
   ...
   { command: /add hike (.+)$/,
+    adminOnly: true,
     response: addHike },
   { command: /delete hike (.+)$/,
+    adminOnly: true,
     response: deleteHike },
   ...
 ];
Then in the responder, we’ll add a guard clause that checks if the route requires “sudo”, and if the word is missing, we’ll respond with “Not allowed.”
 let responder = (message) => {
-  let { command, response } = responses
+  let { command, adminOnly, response } = responses
     .find(({ command, response }) =>
       command.test(message)
     );
+  if (adminOnly && !message.startsWith('sudo')) {
+    return 'Not allowed!';
+  }
   return response(
     command.exec(message).slice(1)
   );
 };
When faced with this kind of feature request — that is, supporting a new behavior that can be generalized for related functions — many developers would probably do what we did and insert that behavior logic into the responder function. It’s quick, keeps the code DRY, and it just feels nice. But it’s also a premature abstraction that conflates responsibilities: the responder function has become responsible for routing and authorization logic.
Every time a feature requires a new qualifier, the responder will be edited. It won’t be long before there are several short if-else statements in the responder — which is precisely what the Router pattern was intended to help us demolish.
From a testing perspective, we can’t unit test the authorization logic for individual chat commands without going through the responder. We can only write integration tests for authorization.
Whenever you’re tempted to alter terse, single responsibility functions to incorporate a new behavior, take a step back and identify the most naive solution that still satisfies the single responsibility principle.
For example, what if we added this admin enforcement logic directly to the addHike() and deleteHike() response functions instead of the responder?
Let’s undo our changes. For the response functions to determine if sudo was used, we need to pass the full chat message:
 let responder = (message) => {
   ...
   return response(
-    command.exec(message).slice(1)
+    { message,
+      match: command.exec(message).slice(1) }
   );
 };
In addHike(), we can add a guard clause that checks if the message starts with “sudo” and returns “Not allowed” if it doesn’t. We can copy-paste this guard clause to deleteHike().
let addHike = ({ match: [hike], message }) => {
  if (!message.startsWith('sudo')) {
    return 'Not allowed!';
  }
  hikes.push(hike);
  return `Added ${hike}!`;
};

let deleteHike = ({ match: [hike], message }) => {
  if (!message.startsWith('sudo')) {
    return 'Not allowed!';
  }
  hikes.splice(hikes.indexOf(hike), 1);
  return `Removed ${hike}!`;
};
This naive solution is feature complete and leaves the responder function focused on one responsibility. But now one if-else statement has multiplied into two in our response functions. So how are we any better off? Well, by letting the naive solution play out, we’re equipped to build an abstraction that solves a concrete problem: the duplicated guard clause.
This guard clause represents a behavior, which we could call adminOnly. When you hear the word “behavior” or “trait”, we’re referring to a cross-cutting concern that can be shared across several functions, even if they do completely different things. The addHike() and deleteHike() response functions have different jobs, but they share a similar behavior.
A great way to share behavior in a language that supports functional programming is through function composition.
Suppose we had a function, called adminOnly(), that receives an unprotected function like addHike(), and returns a new version of addHike() that enforces the use of the “sudo” keyword:
 let responses = [
   ...
   { command: /add hike (.+)$/,
-    response: addHike },
+    response: adminOnly(addHike) },
   { command: /delete hike (.+)$/,
-    response: deleteHike },
+    response: adminOnly(deleteHike) },
   ...
 ];
adminOnly() is easy to code up once you get the parameter signature right. If the message contains the word “sudo”, it invokes the route it received as an argument. Otherwise, it returns the failure message.
let adminOnly = (route) => (request) =>
  request.message.split(' ').includes('sudo')
    ? route(request)
    : 'Not allowed!'
;
I like to call this kind of behavior function an Enforcer: it’s a Higher-Order Function with a guard clause that enforces some authorization rule, like requiring the word “sudo” or checking if the current user is an admin.
The add hike and delete hike commands behave exactly as they did in our first solution. But this time, we didn’t have to edit existing functions to support the new behavior: we only added new functions and composed them. It’s as though we’re writing immutable code, and like immutable data structures, this style of coding has great design benefits and prevents regressions. None of our existing unit tests will change, and the new code already follows the single responsibility principle.
We can even add new enforcement behaviors.
Suppose we want to enforce that the list hikes command include the word “please” with a new behavior called askNicely(). All we need to do is duplicate the adminOnly() behavior, then change the keyword and failure message:
let askNicely = (route) => (request) =>
  request.message.split(' ').includes('please')
    ? route(request)
    : 'You should ask nicely.'
;

let responses = [
  { command: /list hikes$/,
    response: askNicely(listHikes) },
  ...
];
And because these enforcers are built through function composition, they layer without additional work. To make the delete hike command require “sudo” and “please”, we just compose the behaviors.
 let responses = [
   ...
   { command: /delete hike (.+)$/,
-    response: adminOnly(deleteHike) },
+    response: adminOnly(askNicely(deleteHike)) },
   ...
 ];
But what about the duplication between these behaviors? Other than a different keyword and failure message, they look exactly the same. We can DRY them up into an enforcer factory called requireKeyword() that returns a new behavior based on a customizable keyword and failure message.
let requireKeyword = (word, fail) => (route) => (request) =>
  request.message.split(' ').includes(word)
    ? route(request)
    : fail
;
Now the adminOnly() and askNicely() behaviors can be replaced with partial invocations of the requireKeyword() enforcer factory!
let adminOnly = requireKeyword('sudo', 'Not allowed!');
let askNicely = requireKeyword('please', 'You should ask nicely.');
We’ve landed on a solution that satisfies the single responsibility principle, didn’t change existing functions, and produces descriptive code.
responder('list hikes');
// => 'You should ask nicely.'
responder('please list hikes');
// => 'Lost Lake, Canyon Creek Meadows'
responder('add hike Mirror Lake');
// => 'Not allowed!'
responder('sudo add hike Mirror Lake');
// => 'Added Mirror Lake!'
responder('sudo please delete hike Mirror Lake');
// => 'Removed Mirror Lake!'
The enforcer pattern pops up in other places, like guarding authenticated pages in a React web app:
let requireLogin = (Component) => (props) =>
  props.currentUser
    ? <Component {...props} />
    : <Redirect to="/login" />

let ActivityPage = ({ notifications }) =>
  <section>
    <h2>Recent Activity</h2>
    <Notifications notifications={notifications} />
  </section>

export default requireLogin(ActivityPage);
Or rendering a loading indicator while an API request finishes:
let withLoader = (msg) => (Component) => (props) =>
  props.loading
    ? <LoadingIndicator message={message} />
    : <Component {...props} />

let ProfileScreen = ({ stories, user }) =>
  <div>
    <h2>Stories from {user.name}</h2>
    <StoryList stories={stories} />
  </div>

export default withLoader('Wait…')(ProfileScreen);
Or protecting backend routes based on the current user:
let listAllUsers = (req, res) => {
  res.send(users);
};

let adminOnly = (req, res, next) =>
  req.user && req.user.isAdmin
    ? next()
    : res.sendStatus(401);

app.get(
  adminOnly,
  listAllUsers,
);
But we wouldn’t have discovered this pattern without writing the naive copy-paste solution first and letting the repetition guide the refactor.
So don’t try to prevent copy-paste prematurely: instead, let the code be duplicated, then DRY up the duplication through function composition. The naive copy-paste solution will lead you to a resilient abstraction that won’t be outgrown by the next feature.
Today, look for short, repeated if-else statements near the beginning of the function that guard the rest of the function, and try extracting them into an enforcer function.
That’s it for today. Want to keep leveling up your craft? Don’t forget to subscribe to the channel for more rapid codecasts on design patterns, refactoring and development approaches.
]]>
This post originally appeared as a guest blog on Course Report.
Ah, books—the time-tested technique for ingesting knowledge. Programming literature may not be as engaging as Codecademy or CodeCombat, but it will help reinforce concepts and provide perspectives you’d be hard pressed to find in an online course.
Here are five books you should read as you begin your journey as a web developer. Keep in mind that these books won’t teach you to code, so they’re not substitutes for an online course or a coding bootcamp—but they are excellent supplements!
1. JavaScript Allongé

Thanks to frameworks like React and Elm, Functional Programming (FP) has made a huge resurgence in the development community. Yet very few developers understand the basics of Functional Programming beyond the .map() and .forEach() methods.
JavaScript is foremost a functional language, so you can stand out from the crowd of junior developers and improve your problem solving skills with an FP primer. The free JavaScript Allongé eBook is a fun and elegant way to learn the essential concepts of Functional Programming from a JavaScript perspective. You’ll be a shoe-in for React and Elm projects.
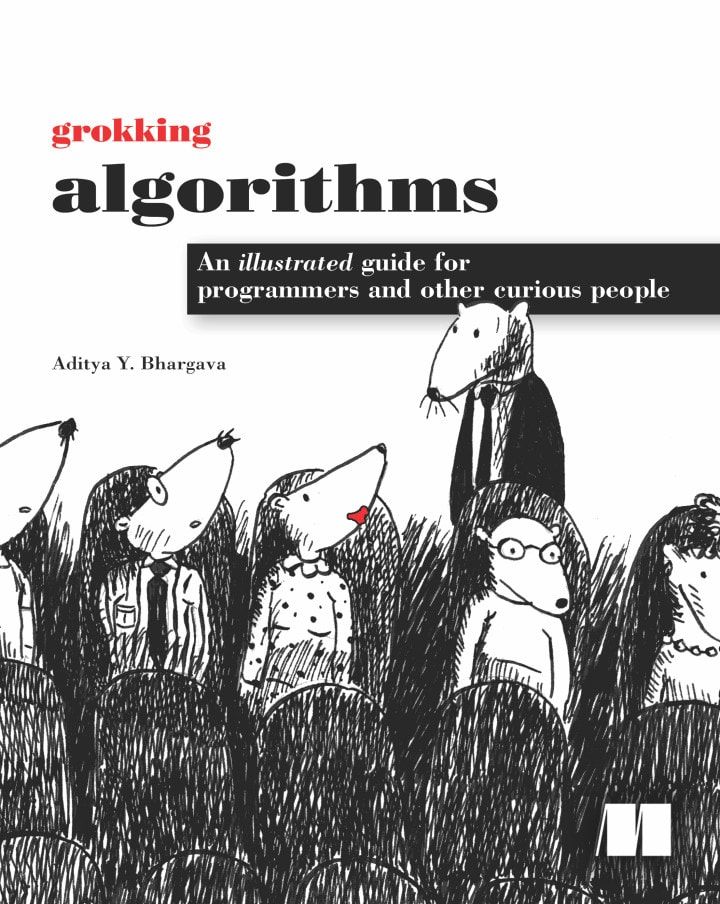
2. Grokking Algorithms
More individuals than ever are joining the developer workforce from a background outside of Computer Science. While you don’t need a CS degree to be a great developer, a grounding in Computer Science can foster a love of clever problem solving and design patterns to help you write smarter code.
It’s unlikely you’ll learn CS basics in a coding bootcamp, but you don’t need to sacrifice four years of your life and $150k on a degree!
Grokking Algorithms is a delightfully unpretentious introduction to hallmark algorithms in Computer Science. The easy-to-follow explanations and colorful illustrations have made it a favorite with my students and mentees.

This is a book you shouldn’t just read. Instead, I recommend scribbling on a whiteboard and pulling up a text editor to implement the algorithm as you read. Better yet, you can code it up with a Test Driven Development (TDD) approach: write tests first, then code up the solution to make the tests pass! Here’s an excellent introduction to TDD from the folks at dwyl.
Grokking Algorithms is surprisingly comprehensive, but if you find algorithms as fun as my mentees have, you’ll quickly run out. Vaidehi Joshi’s basecs project features illustrated guides to a growing list of algorithms, and was recently turned into a podcast.
3. JavaScript: The Good Parts

Stack Overflow has unintentionally become the go-to source for copy-pasting bad example code from JavaScript’s darker recesses. For a new web developer, it can be hard to determine which parts of JavaScript are good to use.
Douglas Crockford is one of the early titans in JavaScript development. His essential guide, JavaScript: The Good Parts, is the traditional book that “every JavaScript developer must read,” especially impressionable newcomers to the web community. As the title suggests, this book is not exhaustive—Crockford focuses only on the good parts of JavaScript, leaving older JavaScript features to rot in cobwebby corners.
4. You Don’t Know JS

On the other side of the spectrum, You Don’t Know JS is a free and fairly comprehensive book series for learning modern JavaScript in its entirety. It’s still not a replacement for a dedicated coding bootcamp, but of all the reads, it requires the least prior experience in web programming.
For hardcore bookworms, Kyle Simpson also sells a hard copy.
5. Mozilla Developer Network Tutorials
These books focus on core JavaScript and algorithms, but don’t specifically address programming in the browser. Mozilla Developer Network (MDN) has amassed an exceptional collection of guides for programming in the browser. Though not strictly a book, the guides are rich with examples and links to references for the many APIs built into web browsers. The MDN guides make a fabulous supplement to any web course or bootcamp!
And of course, MDN is the authoritative source for reference documentation on any browser web API.
Honorable Mention: Eloquent JavaScript

The third edition of Eloquent JavaScript is out, and I’ve heard nothing but praise from my students. And the online version is free! I haven’t yet read through it, so I can’t recommend it firsthand. But at a glance, I’m impressed by Marijn Haverbeke’s elegant teaching style for some fairly complex topics.
6. Books by Dead People
Reading is one of the best ways to cultivate your brain powers, so why stop with programming literature? We are continuously bombarded with the news and opinions of our time, but classic literature provides a chance to step back and glean wisdom from our collective past.
So read books by dead people! Here are some of my favorite classics:
- A Tale of Two Cities by Charles Dickens
- War and Peace by Leo Tolstoy
- Sense and Sensibility by Jane Austen
- Lord of the Rings by J. R. R. Tolkein
- Agatha Christie’s mysteries featuring Hercule Poirot
Pick good literature to fill your brain attic with. If the last time you read was in high school, delight yourself with just how many subtleties you missed in your English classes. You just might watch Netflix (a little) less thanks to your newly-developed craving for reading.
P.S. I wrote a book too! If you want to learn functional design patterns for Node.js backends, you can read a sample of my book, Functional Design Patterns for Express.js.
You can also check out TL;DR, the JavaScript codecast series that teaches working web developers to craft exceptional software in 5 minutes a week. We cover design patterns, refactoring and development approaches at the speed of vim!

How do you tame a group of if-else or switch statements that grows with every feature request? Let’s continue obliterating if-else statements on today’s episode of TL;DR, the JavaScript codecast series that teaches working web developers to craft exceptional software in 5 minutes a week.
Transcript
Last episode we covered nested ternaries. Nested ternaries are a great replacement for if-else statements when we need the power of a conditional, but can afford to replace statements with expressions. But sometimes the number of cases just gets longer and longer.
Even if you extracted each case to a separate function, the function wrapping around the if-else or switch statement will continue to grow unbounded.
Especially in codebases that change hands often, this promotes a sloppy, inconsistent boundary between the individual cases and the mapping logic that decides which case to run.
Today we’re refactoring some code for a chatbot that helps outdoor enthusiasts find great trails to hike.
console.log( responder('list hikes') );
// => Lost Lake
// => Canyon Creek Meadows
console.log( responder('recommend hike') );
// => I recommend Mirror Lake.
console.log( responder('add hike Mirror Lake') );
// => Added Mirror Lake!
console.log( responder('where is Mirror Lake') );
// => Sorry, I don’t understand that.
So far this chatbot can respond to a few basic commands, like “list hikes”, “recommend hike”, and “add hike”. If you ask the chatbot something it doesn’t understand — like “where is Mirror Lake” — it responds with a fallback message.
At the moment, all of this logic lives in the responder function. Our chatbot currently has 4 behaviors, so there are 3 if-else cases and one fallback return statement.
let hikes = [
  'Lost Lake',
  'Canyon Creek Meadows',
];

let randomHike = () =>
  hikes[Math.floor(Math.random() * hikes.length)];

let responder = (message) => {
  if (message === 'list hikes') {
    return hikes.join('\n');
  } else if (message === 'recommend hike') {
    return `I recommend ${randomHike()}`;
  } else if (message.startsWith('add hike')) {
    let hike = message.slice(9);
    hikes.push(hike);
    return `Added ${hike}!`;
  }

  return "Sorry, I don't understand that.";
};
This code is short right now, but that’s because our chatbot only supports 3 commands so far. It will need to understand many more commands, and each new command will add another if-else case.
Ballooning if-else or switch statements are a code smell that suggest the responder function might have too many responsibilities.
So how could we eliminate these cascading if-else statements before they grow to hundreds of cases?
Enter the Router. The Router is a design pattern that helps us turn a giant if-else or switch statement inside out by decoupling the responsibility of routing logic from the business logic of the individual cases.
The Router pattern is particularly nice because we can follow a step-by-step procedure to refactor the code, and at each step the code should still run.
The first step is to extract each case into a separate function and list them in a data structure, like a plain ol’ JavaScript object. Let’s move the code for the 3 chatbot commands into an object called “responses”, using the command as the key.
let responses = {
  'list hikes': () =>
    hikes.join('\n'),
  'recommend hike': () =>
    `I recommend ${randomHike()}`,
  'add hike': (message) => {
    let hike = message.slice(9);
    hikes.push(hike);
    return `Added ${hike}!`;
  },
};
Now that we’ve moved each command into responses, we can replace the cases by looking up the appropriate response function and invoking it. At this point, our code should still work exactly as before.
let responder = (message) => {
  if (message === 'list hikes') {
    return responses['list hikes']();
  } else if (message === 'recommend hike') {
    return responses['recommend hike']();
  } else if (message.startsWith('add hike')) {
    return responses['add hike'](message);
  }

  return "Sorry, I don't understand that.";
};
We’ve finished the first step — it’s usually pretty mechanical, but it often spawns other refactors as you discover subtle side effects and hidden dependencies that need to be passed as an argument. For example, we quickly realized that the “add hike” command needs the rest of the chat message so it can extract the name of the hike.
Now for step 2: let’s collapse the cascading if-else statements. Since each response is listed with its corresponding command in the responses object, we can use the message to directly look up the appropriate response function.
let responder = (message) => {
  let response = responses[message];
  if (response) {
    return response(message);
  }

  return "Sorry, I don't understand that.";
};
If a matching response function is found, we’ll invoke it. Also, since one of our chatbot commands needs the message, we’ll pass it as an argument. You’ll need to find a parameter signature that works for any of your response functions, so this may take some additional refactoring. But it’s okay if a response function ignores those arguments, as the “list hikes” and “recommend hike” commands do.
Nice, we collapsed a 3 case if-else statement into one! In step 3 we’ll eliminate the if-else statement altogether by extracting the fallback behavior into a function of its own. If no response function matched, we’ll use the double pipe operator to insert the fallback response. Now that we know the response variable will always contain a function, we can invoke it unconditionally.
let fallback = () =>
  "Sorry, I don't understand that.";

let responder = (message) => {
  let response = responses[message] || fallback;
  return response(message);
};
And that’s it! The Router pattern helped us turn an if-else statement with several cases inside out. And now the responder function, which was destined to grow without bound, is a simple shell that just dispatches the message to the appropriate response function. In backend terminology, we call the responder function a “router,” and the commands are called “routes.”
Unfortunately, we broke the “add hike” command that expects the message to include the name of the hike after the command, so our simple property lookup isn’t flexible enough.
To fix this, we’ll convert responses to a list and use the find Array method to see which command the message starts with.
let responder = (message) => {
  let [command, response] = Object.entries(responses)
    .find(([command, response]) =>
      message.startsWith(command)
    );
  return response(message);
};
Now that we’ve switched to startsWith, we can move the fallback code to the responses object, and use an empty string as the key! We just need to make sure it comes last. Now we’ve eliminated conditionals from the responder function entirely!
let responses = {
  'list hikes': ... ,
  'recommend hike': ... ,
  'add hike': ... ,
  '': () =>
    "Sorry, I don't understand that."
};
See how control flow got replaced by a data structure? That’s a recurring theme in software design: many problems that are traditionally solved with algorithmic code can be described much more elegantly with a data structure, which is easier to debug, extend and reason about.
In the Router pattern, the mapping data structure doesn’t even have to be an object. We could turn the responses object into an array of objects, with one object per command!
let responses = [
  {
    command: 'list hikes',
    response: () => hikes.join('\n')
  },
  {
    command: 'recommend hike',
    response: () => `I recommend ${randomHike()}`
  },
  {
    command: 'add hike',
    response: (message) => {
      let hike = message.slice(9);
      hikes.push(hike);
      return `Added ${hike}!`;
    }
  },
  {
    command: '',
    response: () =>
      "Sorry, I don't understand that."
  }
];
This format gives us flexibility: to define more complex commands, we can easily switch from strings to regular expressions, and even define capture groups for the response function to receive as an argument!
let responses = [
  {
    command: /^list hikes$/,
    response: () => hikes.join('\n')
  },
  {
    command: /^recommend hike$/,
    response: () => `I recommend ${randomHike()}`
  },
  {
    command: /^add hike (.+)$/,
    response: ([hike]) => {
      hikes.push(hike);
      return `Added ${hike}!`;
    }
  },
  {
    command: /^(.*)$/,
    response: ([message]) =>
      `Sorry, I don't understand "${message}".`
  }
];

let responder = (message) => {
  let { command, response } = responses
    .find(({ command, response }) =>
      command.test(message)
    );
  return response(
    command.exec(message).slice(1)
  );
};
Not only did that simplify the code for “add hike”, but it provides new team members with a template for adding new commands. It’s pretty straightforward to add “where is” by using “add hike” as a starting point.
let responses = [
  ...
  {
    command: /^where is (.+)$/,
    response: ([hike]) =>
      `${hike}? Do I look like a GPS receiver?`
  },
  ...
];
The Router pattern helps us discover common needs across if-else cases and provide a flexible interface to DRY them up. Because the routing logic is backed by a data structure, we can do things that were previously impossible with hard-wired if-else or switch statements, like dynamically enabling particular commands at runtime.
And with each case extracted into a function, we can unit test each response without going through the routing logic first!
The Router pattern helps solve the same problems in Functional Programming that polymorphism does in Object Oriented Programming. And it pops up everywhere: in React you might use this pattern to select which component to render, on the backend you could decide which handler function to invoke for a webhook, in a Redux reducer you can delegate state updates to smaller reducers, and of course on the backend you can define routes for a particular URL.
Today, scan through your codebase for switch and if-else statements that tend to grow with each feature request, and use the Router pattern to turn it inside out.
That’s it for today. Want to keep leveling up your craft? Don’t forget to subscribe to the channel for more rapid codecasts on design patterns, refactoring and development approaches.
]]>
How many times does “else if” appear in your codebase? Let’s examine one way you can cut down on if-else statements in today’s episode of TL;DR, the JavaScript codecast series that teaches working web developers to craft exceptional software in 5 minutes a week.
Transcript
The if-else statement is probably the first control flow construct you learned as a programmer. And yet few things are as terrifying as diving into a legacy codebase swimming in nested, cascading if-else statements.
Code with fewer if-else statements is generally less complex because it has fewer edge cases that need to be tested, and code with fewer statements tends to have a more predictable program flow. A program without any if-else statements or other conditional constructs is incredibly straightforward to reason about, because data will always flow through the program in the same way, even when the inputs and output change.
Now it’s unlikely you could eliminate all if-else statements from a program without making readability worse off. But a lot of if-else statements is a code smell, because they unnecessarily increase the complexity and surface area for bugs.
So in the next few episodes of TL;DR we’ll cover some design patterns to cut down on if-else statements.
Today we’re examining some recursive code with several cascading if-else statements.
resolve({
  user: {
    firstName: 'Jonathan',
    lastName: 'Martin',
    favoritePlaces: () => [
      'Alps',
      'PNW'
    ]
  }
});

/*
 * Spits out:
 */
{
  user: {
    firstName: 'Jonathan',
      lastName: 'Martin',
      favoritePlaces: [
        'Alps',
        'PNW'
      ]
  }
};
This resolve function walks through an object with nested objects, arrays and functions. Given a deeply nested structure like this, it returns a similar structure, but where the functions — like this one for the property favoritePlaces, which was originally a function — have been invoked and replaced with their return value.
Now the logic for the resolve function is pretty terse: if the current structure is an array or object, it recurses over the children. If it’s a function, it invokes it and recurses over the return value. Otherwise, it will just return the structure as-is.
let resolve = (node) => {
  if (isFunction(node)) {
    return resolve(node());
  } else if (isArray(node)) {
    return node.map(resolve);
  } else if (isObject(node)) {
    return mapValues(node, resolve);
  }
  return node;
};
Now these if-else statements aren’t complex per se, in fact it almost looks like it could be a switch statement instead. The problem is the testing conditions — that is, whether the data is a function, array or object — can’t be described with strict equality, which we would need to use a switch statement. Hence, we had to stick with if-else statements instead.
So if the test condition is too complex for a switch statement, is there an alternative that might at least move us away from if-else statements?
Well, the ternary operator is essentially an if-else expression. While an if-else statement runs statements but doesn’t return anything, a ternary expression evaluates and returns the value of one of the two expressions. Let’s write a new version of the resolve function and convert the first if-else case to a ternary: if the node is a function, the ternary evaluates to this case on the left, but otherwise it will evaluate to the case on the right, that is, the node. Like an if-else statement, only code in the matching case is evaluated — the other is completely ignored.
Because JavaScript developers don’t often see ternaries used in production codebases, there is a stigma that ternaries are brittle and have finicky syntax rules. But ternaries are actually more robust than an equivalent if-else statement because you can only embed expressions, and not statements. That makes it harder to sneak a side effect in, like setting a variable or forcing an early return.
The main frustration for many developers is reading another developer’s one-liner ternary, so it’s essential to space them out just like you would an if-else statement.
let resolve = (node) => {
  return isFunction(node)
    ? resolve(node())
    : node;
};
So instead of putting all this on one line, you should indent each case like this. You’ll find this convention popular in the React community for switching between components. With a little practice, a ternary becomes easier to read than the equivalent if-else statement.
But what about those cascading else-ifs we had before? Well since ternaries are just expressions, we can nest else-ifs in the last part of the ternary!
let resolve = (node) => {
  return isFunction(node)
    ? resolve(node())
    : (isArray(node) ? node.map(resolve) : node);
};
Well this is pretty awful to read, let’s fix that with some indentation. Ternaries are designed to cascade, so the parentheses are actually unnecessary. Next, let’s insert a new line after the question marks instead of before. Then unindent each line that starts with a colon so it lines up with the first line.
And for the final else case, the colon will be on a line by itself.
let resolve = (node) => {
  return isFunction(node) ?
    resolve(node())
  : isArray(node) ?
    node.map(resolve)
  :
    node;
};
Let’s practice reading this: if the node is a function, it returns the result of this line, otherwise if node is an array, it returns the result of this line, and finally if the node is neither a function nor an array, node is returned.
Wait a minute, we forgot to add a case for when the node is an object! Well to add it, we can just insert it before the final else.
let resolve = (node) => {
  return isFunction(node) ?
    resolve(node())
  : isArray(node) ?
    node.map(resolve)
  : isObject(node) ?
    mapValues(node, resolve)
  :
    node;
};
By formatting our ternaries like this, we can easily add and rearrange cases without changing other lines or fretting about nested parentheses!
And now that resolve is only one statement, we can drop the curlies and return keyword to make resolve an implicit returning arrow function. In this style, I like to unindent the testing conditions one more level. Now all of the test cases line up in one column, and all of the possible return values line up in another.
let resolve = (node) =>
  isFunction(node) ?
    resolve(node())
: isArray(node) ?
    node.map(resolve)
: isObject(node) ?
    mapValues(node, resolve)
:
    node;
From a control flow perspective, we’ve achieved the holy grail: the resolve function has no variables, no early returns and no statements.
Now you might feel that this exercise of switching from if-else statements to ternary expressions was purely aesthetic, but syntax is just a nice side benefit of the real benefits:
Whereas if-else statements are popular in imperative programming, which is built on control flow, ternary expressions help us think about data flow and produce more declarative code. Functions with a lot of statements tend to have several entry and exit points that new team members need to parse through to keep from introducing a bug. But functions composed of expressions tend to flow in the same way for any inputs.
Today, look through your codebase for cascading if-else statements where each case is roughly the same, like returning a value or setting a variable, and try swapping the if-else for nested ternaries. And in the future, I would encourage you to default to nested ternaries, and make if-else statements the exception. You’ll find they force you to design your code better to begin with.
That’s it for today. Want to keep leveling up your craft? Don’t forget to subscribe to the channel for more rapid codecasts on design patterns, refactoring and development approaches.
]]>This post first appeared on the Big Nerd Ranch blog.
Sooner or later, your React web app will probably accept file uploads—perhaps to change out a user’s avatar or share images on a social site.
In modern browsers, the story for working with binary data is downright impressive thanks to objects like File, Blob and ArrayBuffer. You can even store large complex binary data directly in the browser with IndexedDB!
But working with binary data in a sandboxed tab is different from how a backend or native desktop app handles it. If you read in a 5MB image to a String, you will probably crash the tab. Read in 10 images simultaneously and you may crash the browser!
Luckily, JavaScript exposes natively implemented APIs to handle chunks of binary data. With some creativity, you can have the user’s browser pull its own weight, like resizing images on the front-end before upload. But before you create your own React-powered Hipstergram, it’s important to understand the performance implications of binary data in a web app.
Recap: File Objects and Blobs
The browser can’t directly access the file system for security reasons, but users can drop files into the browser with drag-and-drop.
Here’s a barebones React component that accepts a file, like an image:
let Drop = () =>
  <div onDragOver={e => e.preventDefault()}
       onDrop={e => {
         e.preventDefault()
         let file = e.dataTransfer.files[0]
         console.log(file)
       } }
  >
    ...
  </div>
Once the user drags-and-drops an image onto this <Drop> component, they probably expect to see a thumbnail-sized preview in the browser. The browser provides access to read in the file contents in a few formats like a String or ArrayBuffer, but each image could be 5 MB; drop 10 in the browser and you have 50 MB strings in memory!
So instead of directly returning a String or ArrayBuffer, the browser returns a Blob object. A Blob is essentially a pointer to a data source—it could point to a file on disk, an ArrayBuffer, streaming data, etc. Specifically, the e.dataTransfer.files array holds one or more File objects, which are Blobs with some extra metadata. File objects come with a few more properties, like the source file’s name.
To display the image in the DOM, e.g. with an <img /> tag, you can ask the browser for an ephemeral URL to the Blob object. This URL will only be valid while the tab is open:
...
let file = e.dataTransfer.files[0]
let url = URL.createObjectURL(file)
console.log(url)
// => "blob:http://localhost:3000/266c0711-76dd-4a24-af1f-46a8014204ff"
You can use a blob: URL wherever you would put any other URL—like http://localhost:3000/images/logo.png—and it just works!
The Trouble with “Just Rerender”
How do you use blob: URLs in React? Here’s a simple React app that accepts a dropped image and renders it on screen:
class App extends Component {
  state = { file: null }

  onDrag = event => {
    event.preventDefault()
  }

  onDrop = event => {
    event.preventDefault()
    let file = event.dataTransfer.files[0]
    this.setState({ file })
  }

  render() {
    let { file } = this.state
    let url = file && URL.createObjectURL(file)

    return (
      <div onDragOver={this.onDrag} onDrop={this.onDrop}>
        <p>Drop an image!</p>
        <img src={url} />
      </div>
    )
  }
}
The App component starts without any file; when an image file is dropped onto the <div> element, it updates the state and rerenders with a Blob URL. Easy peasy!
But what happens if this component’s props or state changes? Let’s add a counter that changes 10 times a second:
 class App extends Component {
-  state = { file: null }
+  state = { file: null, counter: 0 }

+  refresh = () => {
+    this.setState(({ counter }) => ({ counter: counter + 1 }))
+  }

+  componentDidMount() {
+    this.timer = setInterval(this.refresh, 100)
+  }

+  componentWillUnmount() {
+    clearInterval(this.timer)
+  }

   onDrag = event => {
     event.preventDefault()
   }

   onDrop = event => {
     event.preventDefault()
     let file = event.dataTransfer.files[0]
     this.setState({ file })
   }

   render() {
     let { file } = this.state
     let url = file && URL.createObjectURL(file)

     return (
       <div onDragOver={this.onDrag} onDrop={this.onDrop}>
         <p>Drop an image!</p>
         <img src={url} />
       </div>
     )
   }
 }
This forces React to rerender the <App> component 10 times a second. That’s fine since React is designed to handle this well, but there’s a problem: the blob: URL changes on every rerender! We can confirm this from the Sources panel in Chrome:

It seems the inline call to URL.createObjectURL() creates tons of extra blob: URLs that never get cleaned up: we’re leaking memory! Changing the URL every single rerender also causes the DOM to change, so sometimes the image will flicker since the browser’s caching mechanism doesn’t know the old and new blob: URLs point to the same image.

At a rerender rate of just 10 times a second, CPU usage explodes to an entire core and bloats memory usage. Eventually garbage collection will catch up, but at the cost of even more CPU usage.
Solution #1: Memoize in Class Component
For our trivial example, we can introduce an easy fix: just create the Blob URL once and store it in the <App> component’s state:
 class App extends Component {
-  state = { file: null, counter: 0 }
+  state = { url: '', counter: 0 }

   ...

   onDrop = event => {
     event.preventDefault()
     let file = event.dataTransfer.files[0]
-    this.setState({ file })
+    this.setState({ url: URL.createObjectURL(file) })
   }

   render() {
-    let { file } = this.state
-    let url = file && URL.createObjectURL(file)
+    let { url } = this.state

     return (
       ...
     )
   }
 }
That totally works, but only if you plan to do nothing else with the data. After the file is dropped, you will likely need to pass the original Blob object around to other React components, perhaps to store it in IndexedDB or upload it with FormData.
Solution #2: It’s Just an Object, Add a Property!
What if we just passed around the immutable Blob object, but added a url property to it with the memoized Blob URL?
 class App extends Component {
   ...

   render() {
     let { file } = this.state
-    let url = file && URL.createObjectURL(file)
+    let url = file && blobUrl(file)

     return (
       ...
     )
   }
 }
let blobUrl = blob => {
  if (!blob.url) {
    blob.url = URL.createObjectURL(blob)
  }
  return blob.url
}
That one change brings down CPU usage to near zero! But… we violated a design principle by modifying an object—the Blob object—from an API that we don’t own.
Solution #3: Global Variable
What if we passed around the Blob object, but instead of modifying it, we stored the generated Blob URL in a big lookup table that only the blobUrl() function can access?
Sounds like a global variable, right?
let hash = file => `${file.name}:${file.type}:${file.size}`

let urls = {}
let blobUrl = blob => {
  let key = hash(blob)
  if (!urls[key]) {
    urls[key] = URL.createObjectURL(blob)
  }
  return urls[key]
}
It’s a great idea, but difficult to execute because the keys in a Plain Ol’ JavaScript Object must be strings, so we can only make a best effort at creating a collision-resistant key per Blob object.
While this will likely work for File objects, it won’t do for Blob objects: they don't have a .name property, so the likelihood of a key collision would be much higher.
The only real way to create a unique hash per Blob object is to tag each Blob object with a unique ID, but then we’re back to modifying the Blob object. However, we’re on the right track.
Solution #4: ES2015 Maps
We need a map type that accepts objects as keys. The POJO won’t do that, but the Map datatype introduced in ES2015 will! Each object has a unique identity because it has its own pointer (place in memory). The Map datatype uses that pointer as the key, so entries are guaranteed to be collision-free!
let urls = new Map()

let blobUrl = blob => {
  if (urls.has(blob)) {
    return urls.get(blob)
  } else {
    let url = URL.createObjectURL(blob)
    urls.set(blob, url)
    return url
  }
}
Boom! But we introduced a subtle problem: we’re leaking memory.
That’s right! In JavaScript we normally don’t manually manage memory, but that doesn’t “free” you from thinking about memory management!
JavaScript employs several strategies and heuristics for efficient garbage collection (like reference counting and generational garbage collection), but we can assume that objects are garbage collected when they are no longer “reachable.”
The urls local variable is in scope and reachable during the app’s entire lifetime. All keys and values in a Map stick around explicitly until removed. So unless we explicitly delete entries from the Map, the Blob objects and blob: URLs will always be reachable—they’ll never be garbage collected. We’re leaking memory!
Solution #5: ES2015 WeakMaps
What if we had a Map datatype that doesn’t prevent the keys from being garbage collected, and automatically deletes the key-value pair once the object becomes unreachable?
That’s precisely what a WeakMap does! It allows us to associate data with an object, but without modifying the original object. A WeakMap behaves like weak references do in Swift and Objective C. Think of them as a noncommittal friend: “If no one needs you, neither do I.”
-let urls = new Map()
+let urls = new WeakMap()

 let blobUrl = blob => {
   if (urls.has(blob)) {
     return urls.get(blob)
   } else {
     let url = URL.createObjectURL(blob)
     urls.set(blob, url)
     return url
   }
 }
WeakMaps are a great way for third-party libraries to “tag” external objects without modifying them. They’re especially useful for adding application-wide memoization.
Here’s the final solution for performant, flicker-free Blob previews:
let urls = new WeakMap()

let blobUrl = blob => {
  if (urls.has(blob)) {
    return urls.get(blob)
  } else {
    let url = URL.createObjectURL(blob)
    urls.set(blob, url)
    return url
  }
}

class App extends Component {
  state = { file: null, counter: 0 }

  refresh = () => {
    this.setState(({ counter }) => ({ counter: counter + 1 }))
  }

  componentDidMount() {
    this.timer = setInterval(this.refresh, 100)
  }

  componentWillUnmount() {
    clearInterval(this.timer)
  }

  onDrag = event => {
    event.preventDefault()
  }

  onDrop = event => {
    event.preventDefault()
    let file = event.dataTransfer.files[0]
    this.setState({ file })
  }

  render() {
    let { file } = this.state
    let url = file && blobUrl(file)

    return (
      <div onDragOver={this.onDrag} onDrop={this.onDrop}>
        <p>Drop an image!</p>
        <img src={url} />
      </div>
    )
  }
}
To reuse blob: URLs throughout your React application, just extract blobUrl() to its own utility file and invoke it directly from any component’s render() method! Or better yet, use stateless functional components.
Wrap-Up
JavaScript is well-equipped to deal efficiently with large chunks of memory, but you have to determine the best way to represent them. When possible, it’s best to use Blob URLs to keep them outside the JavaScript VM’s memory. Objects stored in global variables will never be garbage collected, but WeakMaps are a great solution to break reference cycles.
ES2015 data structures like WeakMaps and ES2017 async functions highlight just how dedicated the JavaScript language is to high-performance modern application development!
This post first appeared on the Big Nerd Ranch blog.
A real-world example of refactoring a class-based component from a React Native app into stateless functional components and higher-order components, in 5 steps.
React is pretty awesome, and with stateless functional components you can create ambitious apps that are 98% plain ol' JavaScript (optionally JSX), and are very lightly coupled to the framework.
Minimizing the surface area between React and your codebase has amazing benefits:
- Framework updates will have little effect on your code.
- You can easily write isolated unit tests, instead of UI integration tests.
There's an important catch to stateless functional components: you can't use state or lifecycle hooks. However, this design encourages component purity and makes it trivial to test our components — after all, it's just a function that maps data to virtual DOM!
“Great, but I'm not building a static page — I need state, so I can’t use stateless functional components!”
In a well-written React app, stateless functional components will cover most of your UI code, but an app's complexity typically relates to state management. To help bug-proof the remainder of our codebase, we are going to turn class-based React Components into stateless functional components with functional programming and higher-order components (HOC) to isolate state from our pure components.
If you aren't familiar with higher-order components, you may want to check out the official React guides first.
What are the benefits?
Why will destroying all classes with functional programming and higher-order components improve your codebase?
Imagine an app where all state is isolated, the rest of your app is a pure function of that state, and each layer of your component tree is trivial to debug directly from the React DevTools. Relish the thought of reliable hot module reloading in your React Native app.
Higher-order components are the ultimate incarnation of composition over inheritance, and in the process of turning our class components inside-out, subtle dependencies and nasty bugs pop right to the surface.
By avoiding classes, we can prevent a super common source of bugs: hidden state. We’ll also find testing gets easier as the software boundaries become self-evident.
Because higher-order components add behavior through composition, you can reuse complex state logic across different UIs and test it in isolation! For example, you can share a data fetching higher-order component between your React web app and React Native app.
Example: Refactoring a React Native component
Let's look at a real-world example from a React Native project. The VideoPage component is a screen in the mobile app that fetches videos from a backend API and displays them as a list. The component has been tidied up a bit to remove distractions, but is unchanged structurally.
import React, { Component } from 'react'
import { ScrollView, Text, View } from 'react-native'

import Loading from 'components/loading'
import Video from 'components/video'
import API from 'services/api'

class VideoPage extends Component {
  constructor(props) {
    super(props)
    this.state = { data: null }
  }

  async fetchData(id) {
    let res = await API.getVideos(id)
    let json = await res.json()
    this.setState({ data: json.videos })
  }

  componentWillMount() {
    this.fetchData(this.props.id)
  }

  renderVideo(video) {
    return (
      <Video key={video.id} data={video} />
    )
  }

  renderVideoList() {
    if (this.state.data.videos.length > 0) {
      return this.state.data.videos.map(video =>
        this.renderVideo(video)
      )
    } else {
      return (
        <View>
          <Text>No videos found</Text>
        </View>
      )
    }
  }

  buildPage() {
    if (this.state.data) {
      return (
        <ScrollView>
          <View>
            <Text>{this.state.data.title}</Text>
            { this.state.data.description ? <Text>{this.state.data.description}</Text> : null }
          </View>
          <View>
            {this.renderVideoList()}
          </View>
        </ScrollView>
      )
    } else {
      return <Loading />
    }
  }

  render() {
    return this.buildPage()
  }
}

export default VideoPage
At 65 lines of code, the VideoPage component is pretty simple, but hides a lot of edge cases. Although there's some syntactic noise that could be removed to bring down the line count a bit, the deeper issue is the high branching complexity and conflation of responsibilities. This single component fetches data, branches on load status and video count, and renders the list of videos. It's tricky to test these behaviors and views in isolation, extract behaviors (like data fetching) for reuse or add performance optimizations.
Rather than jump to the end solution, it's more instructive to see the process. Here's our five-step roadmap to turn VideoPage inside out and destroy all classes!
- Turn instance methods into stateless functional components
- Extract remaining instance methods to plain functions
- Extract branching complexity with higher-order components
- Create a data fetching higher-order component
- Compose behaviors into a single
enhance()function
1. Turn instance methods into stateless functional components
Our first step is to cut down on instance methods, so let's start by extracting .buildPage(), .renderVideo() and .renderVideoList() from the VideoPage class and make them top-level functions.
 class VideoPage extends Component {
   ...

-  renderVideo(video) {
-    ...
-  }

-  renderVideoList() {
-    ...
-  }

-  buildPage() {
-    ...
-  }

   ...
 }

+let renderVideo = video => {
+  ...
+}

+let renderVideoList = () => {
+  ...
+}

+let buildPage = () => {
+  ...
+}
Hmm, those look like components now! Let's rename renderVideoList() and inline renderVideo().
-let renderVideo = video => { ... }

-let renderVideoList = () => {
+let VideoList = () => {
   if (this.state.data.videos.length > 0) {
     return this.state.data.videos.map(video =>
-      this.renderVideo(video)
+      <Video key={video.id} data={video} />
     )
   } else {
Now that the new VideoList component doesn't have access to this, we need to directly pass the data it needs as props. A quick scan through the code shows we just need the list of videos.
-let VideoList = () => {
+let VideoList = ({ videos }) => {
-  if (this.state.data.videos.length > 0) {
+  if (videos.length > 0) {
-    return this.state.data.videos.map(video =>
+    return videos.map(video =>
Hey look, we have a pure component now! Let's do the same to buildPage(), which is really the heart of the VideoPage component.
-let buildPage = () => {
+let VideoPage = ({ data }) => {
-  if (this.state.data) {
+  if (data) {
     return (
       <ScrollView>
         <View>
-          <Text>{this.state.data.title}</Text>
+          <Text>{data.title}</Text>
-          { this.state.data.description ? <Text>{this.state.data.description}</Text> : null }
+          { data.description ? <Text>{data.description}</Text> : null }
         </View>
         <View>
-          {this.renderVideoList()}
+          <VideoList videos={data.videos} />
         </View>
       </ScrollView>
     )
To finish wiring things up, let's rename the original VideoPage class component to VideoPageContainer and change the render() method to return our new stateless functional VideoPage component.
-class VideoPage extends Component {
+class VideoPageContainer extends Component {

   ...

   render() {
-    return this.buildPage()
+    return <VideoPage data={this.state.data} />
   }
 }

-export default VideoPage
+export default VideoPageContainer
So far, here's what we have:
import React, { Component } from 'react'
import { ScrollView, Text, View } from 'react-native'

import Loading from 'components/loading'
import Video from 'components/video'
import API from 'services/api'

class VideoPageContainer extends Component {
  constructor(props) {
    super(props)
    this.state = { data: null }
  }

  async fetchData(id) {
    let res = await API.getVideos(id)
    let json = await res.json()
    this.setState({ data: json.videos })
  }

  componentWillMount() {
    this.fetchData(this.props.id)
  }

  render() {
    return <VideoPage data={this.state.data} />
  }
}

let VideoList = ({ videos }) => {
  if (videos.length > 0) {
    return videos.map(video =>
      <Video key={video.id} data={video} />
    )
  } else {
    return (
      <View>
        <Text>No videos found</Text>
      </View>
    )
  }
}

let VideoPage = ({ data }) => {
  if (data) {
    return (
      <ScrollView>
        <View>
          <Text>{data.title}</Text>
          { data.description ? <Text>{data.description}</Text> : null }
        </View>
        <View>
          <VideoList videos={data.videos} />
        </View>
      </ScrollView>
    )
  } else {
    return <Loading />
  }
}

export default VideoPageContainer
We have successfully split the monolithic VideoPage component into several subcomponents, most of which are pure and stateless. This dichotomy of smart vs. dumb components will set the stage nicely for further refactoring.
2. Extract remaining instance methods to plain functions
What about the remaining instance methods? Let's move the .fetchData() method outside the class to a top-level function and rewire componentDidMount() to invoke it.
-  componentWillMount() {
+  async componentWillMount() {
-    this.fetchData(this.props.id)
+    this.setState({ data: await model(this.props) })
   }
 }

 ...

-async fetchData(id) {
+let model = async ({ id }) => {
   let res = await API.getVideos(id)
   let json = await res.json()
-  this.setState({ data: json.videos })
+  return json.videos
 }
Since we need the lifecycle hook to instantiate data fetching, we can't pull out the .componentWillMount() method, but at least the logic for how to fetch the data is extracted.
3. Extract branching complexity with higher-order components
The VideoList component could stand to be broken down into subcomponents so it's easier to debug the if branches. Let's extract the two cases into their own stateless functional components:
+let VideoListBase = ({ videos }) =>
+  <View>
+    { videos.map(video =>
+      <Video key={video.id} data={video} />
+    ) }
+  </View>
+
+let NoVideosFound = () =>
+  <View>
+    <Text>No videos found</Text>
+  </View>
+
 let VideoList = ({ videos }) => {
   if (videos.length > 0) {
-    return videos.map(video =>
-      <Video key={video.id} data={video} />
-    )
+    return <VideoListBase videos={videos} />
   } else {
-    return (
-      <View>
-        <Text>No videos found</Text>
-      </View>
-    )
+    return <NoVideosFound />
   }
 }
Hmm, the current VideoList component is nothing more than an if statement, which is a common component behavior. And thanks to functional programming, behaviors are easy to reuse through higher-order components.
There's a great library for reusable behavior like branching: Recompose. It's a lightly coupled utility library for creating higher-order components (which are really just higher-order functions).
Let's replace VideoList with the branch higher-order component.
+import { branch, renderComponent } from 'recompose'

-let VideoList = ({ videos }) => {
-  if (videos.length > 0) {
-    return <VideoListBase videos={videos} />
-  } else {
-    return <NoVideosFound />
-  }
-}
+let VideoList = branch(
+  ({ videos }) => videos.length === 0,
+  renderComponent(NoVideosFound)
+)(VideoListBase)
When there are no videos, the branch() higher-order component will render the NoVideosFound component. Otherwise, it will render VideoListBase.
A higher-order component is usually curried. The first invocation accepts any number of configuration arguments — like a test function — and the second invocation accepts only one argument: the base component to wrap. Currying doesn't seem to gain us anything yet, but later when we stack several higher-order components together, the currying convention will save us some boilerplate and make testing really elegant.
Take a look at some of these Recompose recipes for more inspiration.
4. Create a data fetching higher-order component
We're nearly done! VideoPageContainer is now a generic, reusable "smart component" that fetches data asynchronously and passes it as a prop to another component. Let's turn VideoPageContainer into our own higher-order component, called withModel():
+let withModel = (model, initial) => BaseComponent =>
-  class VideoPageContainer extends Component {
+  class WithModel extends Component {
     constructor(props) {
       super(props)
-      this.state = { data: null }
+      this.state = { data: initial }
     }

     ...

     render() {
-      return <VideoPage data={this.state.data} />
+      return <BaseComponent data={this.state.data} />
     }
   }
 }
The function signature of withModel() indicates that the first invocation should provide a function for fetching the necessary data, followed by an initial value for the data while it is loading. The second invocation takes the component to wrap, and returns a brand new component with data fetching behavior.
To use withModel(), let's invoke it with the VideoPage stateless functional component and export the result.
-export default VideoPageContainer
+export default withModel(model, null)(VideoPage)
The withModel() higher-order component will definitely be useful for other components in the app, so it should be moved to its own file!
5. Compose behaviors into a single enhance() function
Currying the withModel() higher-order component has an elegant benefit: we can stack more "behaviors" with Recompose utilities! Similar to our work with the VideoList and NoVideosFound components, let's extract the if (data) edge cases from VideoPage with the branch() higher-order component to render the Loading component while the data is being fetched:
-import { branch, renderComponent } from 'recompose'
+import { branch, renderComponent, compose } from 'recompose'

 ...

-let VideoPage = ({ data }) => {
+let VideoPage = ({ data }) =>
-  if (data) {
-    return (
   <ScrollView>
     ...
   </ScrollView>
-    )
-  } else {
-    return <Loading />
-  }
-}

+export let enhance = compose(
+  withModel(model, null),
+  branch(
+    ({ data }) => !data,
+    renderComponent(Loading)
+  )
+)

-export default withModel(model, null)(VideoPage)
+export default enhance(VideoPage)
The compose() utility saves us from deeply nested parentheses and linearizes stacked behaviors into a single function, conventionally called enhance(). Hurray for clean git diffs!
And now the VideoPage "dumb component" focuses solely on the happy path: when there is data and at least one video to display. By reading the enhance function from top to bottom, we can quickly parse out other behaviors or even add new ones, e.g. performance optimizations with onlyUpdateForKeys().
Final result
After a few more tweaks, here is the completed VideoPage component in 52 lines of code (also on Github):
import React from 'react'
import { ScrollView, Text, View } from 'react-native'
import { compose, branch, renderComponent } from 'recompose'

import Loading from 'components/loading'
import Video from 'components/video'
import API from 'services/api'
import withModel from 'lib/with-model'

let VideoPage = ({ data }) =>
  <ScrollView>
    <View>
      <Text>{data.title}</Text>
      { data.description ? <Text>{data.description}</Text> : null }
    </View>
    <View>
      <VideoList videos={data.videos} />
    </View>
  </ScrollView>

let VideoListBase = ({ videos }) =>
  <View>
    { videos.map(video =>
      <Video key={video.id} data={video} />
    ) }
  </View>

let NoVideosFound = () =>
  <View>
    <Text>No videos found</Text>
  </View>

let VideoList = branch(
  ({ videos }) => videos.length === 0,
  renderComponent(NoVideosFound)
)(VideoListBase)

let model = async ({ id }) => {
  let res = await API.getVideos(id)
  let json = await res.json()
  return json.videos
}

export let enhance = compose(
  withModel(model, null),
  branch(
    ({ data }) => !data,
    renderComponent(Loading)
  )
)

export default enhance(VideoPage)
Not bad! At a glance, we can see the happy path for rendering VideoPage, how it fetches data, and how it handles the load state. When we add new behaviors in the future, we will only add new code instead of modifying existing code. So in a way, functional programming helps you write immutable code!
Interestingly, every component and function (except model()) is an arrow function with an implied return. This isn't just about syntactic noise: the implied return makes it harder to sneak in side effects! The code looks like a strict "data in, data out" pipeline. The implied return also discourages you from assigning to local variables, so it is hard for ugly interfaces to hide when all destructuring must happen in the parameter list. And to add impure behaviors like performance optimization or handlers, you are naturally forced to use higher-order components.
We can even test the component's enhancer in isolation by stubbing out the VideoPage component:
import { enhance } from 'components/video-page'

it('renders when there is data', () => {
  let Stub = () => <a>TDD FTW</a>

  let Enhanced = enhance(Stub)

  /* Perform assertions! */
})
Back when rendering was tangled up in instance methods, our only hope of extracting behaviors was through inheritance, e.g. mixins. But now we can reuse behaviors through straightforward function composition. The inside-out transformation also highlights that VideoList should be extracted to its own module, video-list.js.
It's a wrap, err, sandwich
Functional programming recipes and patterns go a long way to creating elegant, resilient and test-friendly code by minimizing the surface area between our code and the framework. Whether you are creating a React web app or React Native app, higher-order components are a particularly powerful technique because they encourage composition over inheritance.
With functional programming, we can build React components that resemble a tasty sandwich, where we can peel back each ingredient and debug layer-by-layer.
By contrast, class-based components are a burrito wrap with potato salad.
]]>This post first appeared on the Big Nerd Ranch blog.
"JavaScript is single-threaded, so it doesn't scale. JavaScript is a toy language because it doesn't support multithreading." Outside (and inside) the web community, statements like these are common.
And in a way, it's true: JavaScript’s event loop means your program does one thing at a time. This intentional design decision shields us from an entire class of multithreading woes, but it has also birthed the misconception that JavaScript can’t handle concurrency.
But in fact, JavaScript's design is well-suited for solving a plethora of concurrency problems without succumbing to the "gotchas" of other multithreaded languages. You might say that JavaScript is single-threaded… just so it can be multithreaded!
Recap: Concurrency
You may want to do some homework if "concurrency" and "parallelism" are new to your vocabulary. TL;DR: for simple programs, we usually write "sequential" or ("serial") code: one step executes at a time, and must complete before the next step begins. If JavaScript could perform a "blocking" AJAX request with ajaxSync(), serial code might look like this:
console.log('About to make a request.');
let json = ajaxSync('https://api.google.com/search.json');
console.log(json);
console.log('Finished the request.');

/*
  => About to make a request.
  ... AJAX request runs ...
  ... a couple seconds later ...
  ... AJAX request finishes ...
  => { all: ['the', 'things'] }
  => Finished the request.
*/
Until the AJAX request completes, JavaScript pauses (or "blocks") any lines below from executing. In contrast, concurrency is when the execution of one series of steps can overlap another series of steps. In JavaScript, concurrency is often accomplished with async Web APIs and a callback:
console.log('About to make a request.');
ajaxAsync('https://api.google.com/search.json', json => {
  console.log(json);
  console.log('Finished the request.');
});
console.log('Started the request.');

/*
  => About to make a request.
  ... AJAX request runs in the background ...
  => Started the request.
  ... a couple seconds later ...
  ... AJAX requests finishes ...
  => { all: ['the', 'things'] }
  => Finished the request.
*/
In this second version, the AJAX request only "blocks" the code inside the callback (logging the AJAX response), but the JavaScript runtime will go on executing lines after the AJAX request.
Recap: Event Loop
The JavaScript runtime uses a mechanism, called the "event loop," to keep track of all in-progress async operations so it can notify your program when an operation finishes. If you are unfamiliar with the event loop, check out Philip Robert's exceptional 20 minute overview from ScotlandJS: "Help, I'm stuck in an event-loop."
Thanks to the event loop, a single thread can perform an admirable amount of work concurrently. But why not just reach for multithreading?
Software is harder to write (and debug) when it constantly switches between different tasks through multithreading. So unlike many languages, JavaScript finishes one thing at a time—a constraint called "run-to-completion"—and queues up other things to do in the background. Once the current task is done, it grabs the next chunk of work off the queue and executes to completion.
Since the JavaScript runtime never interrupts code that is already executing on the call stack, you can be sure that shared state (like global variables) won't randomly change mid-function—reentrancy isn't even a thing! Run-to-completion makes it easy to reason about highly concurrent code, for which reason Node.js is so popular for backend programming.
Although your JavaScript code is single-threaded and only does one thing at a time, the JavaScript Runtime and Web APIs are multithreaded! When you pass a callback function to setTimeout() or start an AJAX request with fetch(), you are essentially spinning up a background thread in the runtime. Once that background thread completes, and once the current call stack finishes executing, your callback function is pushed onto the (now empty) call stack and run-to-completion. So your JavaScript code itself is single-threaded, but it orchestrates legions of threads!
However, we need some patterns to write concurrent code that is performant and readable.
Recap: Promise Chaining
Suppose we are building a media library app in the browser and are writing a function called updateMP3Meta() that will read in an MP3 file, parse out some ID3 metadata (e.g. song title, composer, artist) and update a matching Song record in the database. Assuming the read(), parseMP3() and Song.findByName() functions return Promises, we could implement it like this:
let read     = (path) => { ... }; // returns a Promise
let parseMP3 = (file) => { ... }; // returns a Promise
let Song = {
  findByName(name) { ... } // returns a Promise
};

let updateMP3Meta = (path) => {
  return read(path)
    .then(file => {
      return parseMP3(file).then(meta => {
        return Song.findByName(file.name).then(song => {
          Object.assign(song, meta);
          return song.save();
        });
      });
    });
};
It does the job, but nested .then() callbacks quickly turn into callback hell and obscure intent… and bugs. We might try using Promise chaining to flatten the callback chain:
let updateMP3Meta = (path) => {
  return read(path)
    .then(file => parseMP3(file))
    .then(meta => Song.findByName(file.name))
    .then(song => {
      Object.assign(song, meta);
      return song.save();
    });
};
This reads nicely, but unfortunately it won't work: we can't access the file variable from the second .then() callback, nor meta from the third .then() anymore! Promise chaining can tame callback hell, but only by forfeiting JavaScript's closure superpowers. It's hardly ideal—local variables are the bread-and-butter of state management in functional programming.
Recap: Async Functions
Luckily, ES2017 async functions merge the benefits of both approaches. Rewriting our updateMP3Meta() as an async function yields:
let updateMP3Meta = async (path) => {
  let file = await read(path);
  let meta = await parseMP3(file);
  let song = await Song.findByName(file.name);
  Object.assign(song, meta);
  return song.save();
};
Hurray! async functions give us local scoping back without descending into callback hell.
However, updateMP3Meta() unnecessarily forces some things to run serially. In particular, MP3 parsing and searching the database for a matching Song can actually be done in parallel; but the await operator forces Song.findByName() to run only after parseMP3() finishes.
Working in Parallel
To get the most out of our single-threaded program, we need to invoke JavaScript's event loop superpowers. We can queue two async operations and wait for both to complete:
let updateMP3Meta = (path) => {
  return read(path)
    .then(file => {
      return Promise.all([
        parseMP3(file),
        Song.findByName(file.name)
      ]);
    })
    .then(([meta, song]) => {
      Object.assign(song, meta);
      return song.save();
    });
};
We used Promise.all() to wait for concurrent operations to finish, then aggregated the results to update the Song. Promise.all() works just fine for a few concurrent spots, but code quickly devolves when you alternate between chunks of code that can be executed concurrently and others that are serial. This intrinsic ugliness is not much improved with async functions:
let updateMP3Meta = async (path) => {
  let file = await read(path);
  let metaPromise = parseMP3(file);
  let songPromise = Song.findByName(file.name);

  let meta = await metaPromise;
  let song = await songPromise;

  Object.assign(song, meta);
  return song.save();
};
Instead of using an inline await, we used [meta|song]Promise local variables to begin an operation without blocking, then await both promises. While async functions make concurrent code easier to read, there is an underlying structural ugliness: we are manually telling JavaScript what parts can run concurrently, and when it should block for serial code. It's okay for a spot or two, but when multiple chunks of serial code can be run concurrently, it gets incredibly unruly.
We are essentially deriving the evaluation order of a dependency tree… and hardcoding the solution. This means "minor" changes, like swapping out a synchronous API for an async one, will cause drastic rewrites. That's a code smell!
Real Code
To demonstrate this underlying ugliness, let's try a more complex example. I recently worked on an MP3 importer in JavaScript that involved a fair amount of async work. (Check out my blog post or the parser source code if you're interested in working with binary data and text encodings.)
The main function takes in a File object (from drag-and-drop), loads it into an ArrayBuffer, parses MP3 metadata, computes the MP3's duration, creates an Album in IndexedDB if one doesn't already exist, and finally creates a new Song:
import parser from 'id3-meta';
import read from './file-reader';
import getDuration from './duration';
import { mapSongMeta, mapAlbumMeta } from './meta';
import importAlbum from './album-importer';
import importSong from './song-importer';

export default async (file) => {
  // Read the file
  let buffer = await read(file);

  // Parse out the ID3 metadata
  let meta = await parser(file);
  let songMeta = mapSongMeta(meta);
  let albumMeta = mapAlbumMeta(meta);

  // Compute the duration
  let duration = await getDuration(buffer);

  // Import the album
  let albumId = await importAlbum(albumMeta);

  // Import the song
  let songId = await importSong({
    ...songMeta, albumId, file, duration, meta
  });

  return songId;
};
This looks straightforward enough, but we're forcing some async operations to run sequentially that can be executed concurrently. In particular, we could compute getDuration() at the same time that we parse the MP3 and import a new album. However, both operations will need to finish before invoking importSong().
Our first try might look like this:
export default async (file) => {
  // Read the file
  let buffer = await read(file);

  // Compute the duration
  let durationPromise = getDuration(buffer);

  // Parse out the ID3 metadata
  let metaPromise = parser(file);
  let meta = await metaPromise;

  let songMeta = mapSongMeta(meta);
  let albumMeta = mapAlbumMeta(meta);

  // Import the album
  let albumIdPromise = importAlbum(albumMeta);

  let duration = await durationPromise;
  let albumId = await albumIdPromise;

  // Import the song
  let songId = await importSong({
    ...songMeta, albumId, file, duration, meta
  });

  return songId;
};
That took a fair amount of brain tetris to get the order of awaits right: if we hadn't moved getDuration() up a few lines in the function, we would have created a poor solution since importAlbum() only depends on albumMeta, which only depends on meta. But this solution is still suboptimal! getDuration() depends on buffer, but parser() could be executing at the same time as read(). To get the best solution, we would have to use Promise.all() and .then()s.
To solve the underlying problem without evaluating a dependency graph by hand, we need to define groups of serial steps (which execute one-by-one in a blocking fashion), and combine those groups concurrently.
What if there was a way to define such a dependency graph that's readable, doesn't break closures, doesn't resort to .then(), and doesn't require a library?
Async IIFEs
That's where async IIFEs come in. For every group of serial (dependent) operations, we'll wrap them up into a micro API called a "task":
let myTask = (async () => {
  let other = await otherTask;
  let result = await doCompute(other.thing);
  return result;
})();
Since all async functions return a Promise, the myTask local variable contains a Promise that will resolve to result. I prefer to call these *Task instead of *Promise. Inside the async IIFE, operations are sequential, but outside we aren't blocking anything. Furthermore, inside a task we can wait on other tasks to finish, like otherTask, which could be another async IIFE.
Let's turn the getDuration() section into a task called durationTask:
let durationTask = (async () => {
  let buffer = await readTask;
  let duration = await getDuration(buffer);
  return duration;
})();
Since these tasks are defined inline, they have access to variables in the outer closure, including other tasks!
Refactoring into Async Tasks
Let's refactor the entire importer with async IIFEs, or "tasks":
export default async (file) => {
  // Read the file
  let readTask = read(file);

  // Parse out the ID3 metadata
  let metaTask = (async () => {
    let meta = await parser(file);
    let songMeta = mapSongMeta(meta);
    let albumMeta = mapAlbumMeta(meta);
    return { meta, songMeta, albumMeta };
  })();

  // Import the album
  let albumImportTask = (async () => {
    let { albumMeta } = await metaTask;
    let albumId = await importAlbum(albumMeta);
    return albumId;
  })();

  // Compute the duration
  let durationTask = (async () => {
    let buffer = await readTask;
    let duration = await getDuration(buffer);
    return duration;
  })();

  // Import the song
  let songImportTask = (async () => {
    let albumId = await albumImportTask;
    let { meta, songMeta } = await metaTask;
    let duration = await durationTask;

    let songId = await importSong({
      ...songMeta, albumId, file, duration, meta
    });

    return songId;
  })();

  let songId = await songImportTask;

  return songId;
};
Now reading the file, computing duration, parsing metadata and database querying will automatically run concurrently or serially—we were even able to leave getDuration() in its original spot! By declaring tasks and awaiting them inside other tasks, we defined a dependency graph for the runtime and let it discover the optimal solution for us.
Suppose we wanted to add another step to the import process, like retrieving album artwork from a web service:
// Look up album artwork from a web service
let albumArtwork = await fetchAlbumArtwork(albumMeta);
Prior to the async IIFE refactor, adding this feature would have triggered a lot of changes throughout the file, but now we can add it with just a small isolated chunk of additions!
+// Look up album artwork from a web service
+let artworkTask = (async () => {
+  let { albumMeta } = await metaTask;
+  let artwork = await fetchAlbumArtwork(albumMeta);
+  return artwork;
+})();

 // Import the album
 let albumImportTask = (async () => {
+  let artwork = await artworkTask;
   let { albumMeta } = await metaTask;
-  let albumId = await importAlbum(albumMeta);
+  let albumId = await importAlbum({ artwork, ...albumMeta });
   return albumId;
 })();
Tasks are declarative, so managing concurrent vs. serial execution order becomes an "execution detail" instead of an "implementation detail"!
What if we revamped our parser() function so it could synchronously parse an ArrayBuffer instead of a File object? Before this would have triggered a cascade of line reordering, but now the change is trivial:
 // Parse out the ID3 metadata
 let metaTask = (async () => {
+  let buffer = await readTask;
-  let meta = await parser(file);
+  let meta = parser(buffer);
   let songMeta = mapSongMeta(meta);
   let albumMeta = mapAlbumMeta(meta);
   return { meta, songMeta, albumMeta };
 })();
Objections
It's tempting to take shortcuts and solve the dependency graph yourself. For example, after our changes to parser() above, all of the tasks depend on the file being read in, so you could block the entire function with await read(file) to save a few lines. However, these areas are likely to change, and organizing into serial tasks provides other benefits: these micro APIs make it is easier to read, debug, extract and reason about a complex chunk of concurrency.
Since we wrapped these tasks into async IIFEs, why not extract them into dedicated functions? For the same reason we couldn't use Promise chaining: we have to give up nested closures and lexically scoped variables. Extracting tasks into top level functions also begs a design question: if all these operations were synchronous, would we still perform this extraction?
If you find yourself extracting async functions (as we did with importAlbum() and importSong()) because of their complexity or reusability, bravo! But ultimately, design principles for breaking down functions should be independent of whether the code is async vs. sync.
Also, splitting functions or moving them too far from their context makes code harder to grasp, as Josh discusses in his post about extracting methods.
More to Come
Functional programming is well-suited to multithreading because it minimizes shared state and opts for local variables as the de facto state mechanism. And thanks to JavaScript's event loop, we can deal with shared state by merging results inside a single thread.
Next time, we'll examine functional patterns for throttling concurrency on a single thread, then wrap up with techniques for efficiently managing a cluster of Web Workers… without worrying a shred about "thread safety."
]]>This post first appeared on the Big Nerd Ranch blog.
The magical moment has arrived: your startup just got its first round of funding, and you’re ready to crunch out an MVP that will dazzle your users and make investors salivate.
Only, you have no clue what tech stack to use.
You heard that Node.js is pretty popular for building a backend server because “hey, it’s JavaScript on the backend!” and there’s a huge pool of full-stack developers to hire from. But weeks of Reddit-ing and Hacker News-ing later, you have an equal collection of posts that say Node is “literally the best” and “definitely the worst.”
Optimize for the Right Things™
In truth, your choice of tech stack will rarely make or break your company. Since a new service often starts out as an MVP-style proof-of-concept, your backend server may only see a few hundred users before it’s scrapped and rewritten (or dies if you join the 92% of startups that fail).
So if you are worrying about “Will it scale to handle tons of users?” you may be asking the wrong question. If you have reached a scale where your decision actually matters… congratulations! But unless you are a large service with an established user base, you have time to worry about scaling later. Don’t kill your startup by prematurely optimizing your tech stack. Instead, focus on maximizing developer speed and happiness. Usually, this means leveraging what your team already knows best.
With that in mind, Node.js will often hit the sweet spot: it scales to huge amounts of traffic, and likely your team is already skilled in JavaScript.
Trailblazers
If you are ready to jump into Node.js, you’re in great company! A growing list of the largest retailers, banking, social media, news and media outlets have switched to Node.js and enjoyed some wonderful results:
Why has Node.js worked so well for these companies?
What is JavaScript?
To answer this, it will help to understand how Node.js works. At its core, Node is a runtime for executing JavaScript code on a server. Traditionally, JavaScript was run only in the browser, but nowadays you’ll find JavaScript in a lot of places.
JavaScript is a dynamic, lexically scoped, duck-typed scripting language. Practically speaking, this means developers can quickly modify code without recompiling and enjoy exploratory programming, which makes debugging easier. Dynamic scripting languages have traditionally been much slower than their compiled counterparts, but thanks to the browser wars and the Google V8 engine, JavaScript often runs within an order of magnitude of the speed of its native equivalent, and in optimized subsets runs only 50% slower than native code.
Despite the name, JavaScript has nothing to do with Java, so the paradigms and patterns used in Java are nothing like JavaScript. JavaScript favors functional programming, a programming model for building programs through closures, function composition, argument currying, etc. From a quality perspective, functional-style code is often simpler to test than a class-oriented counterpart (though it doesn’t have to be).
What is Node.js?
In technicalese, Node.js is a “non-blocking, event-driven I/O runtime.” Does that read like “word soup”? Let’s make a sandwich instead.
Traditional backend tech stacks work like a sandwich shop: for every customer, a sandwich maker will be assigned to you while you instruct them in what toppings you would like. So if the sandwich shop has one sandwich maker, the shop can handle one customer at a time. To serve more customers simultaneously, you just hire more sandwich makers.
This paradigm works great because making sandwiches is fast, and there’s not much waiting in between adding toppings.
But now imagine a fancy sit-down restaurant. Instead of getting in-and-out with a sandwich in 3 minutes, customers will likely spend an hour dining. If each customer monopolized a chef’s time for an entire hour, you’d need a lot of cooks!
So instead of customers talking directly to a chef, each customer is assigned a waiter. Still, it would be nonsensical for a waiter to be stuck with a customer until they left, because there’s lots of waiting! The waiter will wait for the customer to be ready to order, for their food to be prepared, etc. But a single waiter can attend to multiple customers over the period of an hour: after they take an order, they forward it to a chef and check on other customers.
But it’s easy to predict when your waiter will leave you to attend to other customers: they won’t ask you to “hold that thought” and leave you in the middle of ordering. Instead, they will only leave when you’ve finished placing your order—that way, waiters won’t have to remember what the customer was halfway through ordering.
While waiters are good at helping customers discover new items and validating their menu choices, they can’t handle lengthy tasks—otherwise, their other customers could be waiting for a while. Instead, a waiter delegates time-consuming tasks, like food preparation, to other people.
In short, a waiter doesn’t do any one thing that takes much time.
When the restaurant is clogged with customers, there is now a possible bottleneck: you might not have enough cooks! In such a case, you wouldn’t employ more waiters to speed up order time—instead, you should hire more chefs. However, sometimes exceptional circumstances arise and a waiter needs to leave unexpectedly. To add “fault-tolerance,” you just add more waiters!
Splitting up restaurant duties into labor-intensive food preparation and multitask-style waiting makes sense. And in the world of backend tech stacks, Node.js is your waiter at a sit-down restaurant!
What is Node.js good at?
Like a restaurant waiter, Node.js is exceptionally good at waiting. For a backend server, this may seem strange—why would the backend wait before responding to a browser’s HTTP request? Most backends wait for a lot of resources before responding: they fetch data from a database, read a file from disk, or just wait to finish streaming the response back to the browser!
This wouldn’t be problematic if there was only one request at a time, but if your backend needs to handle 20 requests simultaneously, blocking 19 of the other requests until the first one finishes is not an option. To solve this, most backend stacks rely on multithreading and load balancers.
But why can’t a single backend process handle multiple requests concurrently, like a waiter, so long as no task takes long? This is the superpower of Node.js: a single Node process can seamlessly handle hundreds of thousands of simultaneous requests by juggling between requests whenever it must wait for a resource (database, reading a file off disk, or networking). This paradigm, called asynchronous or cooperative multitasking, allows the backend to predictably make context switches when it gets to a good stopping point, i.e. when it’s waiting for something. This is in contrast to preemptive multitasking, which gives each request handler a slice of time to compute before forcefully switching to another request handler.
It turns out a large category of web services do a lot of waiting by delegating to other services (database, file system, networking), then aggregate the data into a suitable response. Because “context switches” between these simultaneous tasks are predictable, memory usage stays very low and there are far fewer worries about thread safety.
Even though your code is single-threaded, you can scale it in the same way you would a restaurant: add more waiters! Or in this case, run more processes (usually, one per CPU core).
So Node supports cooperative multitasking, but not through multithreading. This isn’t a disadvantage—it actually makes programs easier to reason about! What if a waiter could leave a customer in the middle of ordering? They would need to keep track of where they left off ordering. But what if during that time someone persuaded the customer to order something different? Since the code is single-threaded, we don’t need to worry about thread safety since we know the waiter will only leave off when a customer is done ordering.
This model makes Node particularly well-suited for building realtime services—a single process can handle many thousands of concurrent WebSocket connections without blowing up memory usage or becoming sluggish.
What isn’t Node.js good at?
As the homepage asserts, Node.js is really good for programs that deal with event-oriented I/O (input/output). This also means that there are a lot of things Node.js is not good at.
In particular, Node does its best to make blocking operations impossible: all the core APIs are asynchronous. But despite JavaScript’s execution speed, you can still “block the Event Loop” by performing CPU intensive tasks. If your backend needs to analyze data or do complex aggregation and filtering, you will annul Node’s primary strength.
Thankfully, Node comes with many core APIs that are implemented natively which effectively run on separate threads selected from a thread pool, so you can do a lot of “CPU intensive” things in Node without blocking. If you need to do some custom intensive computation, you can leverage the WebWorkers API to create thread safe background workers. Or, you can build out specialized microservices, perhaps with Elixir or Rust, and use them as a “backend for your backend.”
Since Node.js is a general-purpose programming language, a naive HTTP server will not be fault-tolerant (resilient to crashes) out of the box. For a single-threaded server, a process supervisor like forever will do, but to leverage multi-core CPUs you will want to use the built-in cluster API.
Why is Node so popular?
With these caveats in mind, Node.js is an exceptional fit for many backend servers. Its extreme popularity among developers is especially telling, and with good reason:
- It’s easy to get caught up in a language’s elegance, yet overlook the most important aspect of a tech stack: its community support and libraries. JavaScript enjoys the largest community (people and open source libraries) of any language, and Node inherits these benefits with the npm package manager, “the largest ecosystem of open source libraries in the world.”
- With ES2017 (the 2017 release of JavaScript), async programming is incredibly straightforward and readable with
asyncfunctions. - Node adopts new features and APIs rapidly, so developers can enjoy all of the tooling and APIs the TC39 committee has helped standardize for years in browsers. As a pleasant consequence of the io.js hostile fork, Node.js is 100% open-source, has an open governance model and is supported by a diverse community of independent contributors and company backers who frequently contribute to Node’s fantastic production readiness.
- Thanks to this community, you won’t be alone when you are finally ready to start scaling your Node.js powered backend.
All told, this means Node.js is unlikely to stagnate or die out since it builds on the web platform’s incredible momentum. And at eight years old, it’s a safe bet that Node.js will continue to innovate for years to come.
Now excuse me, I'm headed to a hibachi steakhouse…
]]>This post first appeared on the Big Nerd Ranch blog.
Check out the finished code on Github.
Like all good blog posts, this one started with a conversation on Twitter. Giovanni Cortés showed off an elegant snippet of Elixir code that leverages destructuring to parse the song metadata (title, author, etc.) from an MP3 audio file.
About this time I was brainstorming new topics for our web development guide about JavaScript’s high-performance data types. Although JavaScript’s destructuring isn’t as extensive as Elixir’s, it has great APIs for efficiently operating on large chunks of binary data.
While reading the tweet, I was also enjoying my favorite orchestral piece—Snöfrid, a beautiful melodrama by the Finnish composer Jean Sibelius—over coffee. So what could be more appropriate during a caffeine high amongst Scandinavian decor than to create an MP3 metadata reader with JavaScript?
Getting Started
To compose this masterpiece, we will use some standardized APIs available in both the browser and Node. For simplicity we will build a command-line tool with Node, but apart from reading in a file, the code will run as is in the browser!
MP3 metadata, like the song’s title and composer, is stored in a format called “ID3” at the beginning (or end) of an MP3 file. We’ll just pretend it stands for “MP3 information” since the acronym’s true origins seem mysterious.
There are several revisions of the ID3 spec. Giovanni’s lovely Elixir example extracts ID3v1 metadata (called “TAG”) from an MP3 file. The TAG spec is incredibly straightforward to parse since it uses fixed length fields. Unfortunately, it turned out to be too simplistic, so most of the MP3s in your music library use the much more flexible (and complex) ID3v2.3.0 spec. This version supports arbitrary length metadata and internationalization via alternate text encodings.
If you’re interested in seeing an ID3v1 reader, check out this implementation by Eric Bidelman. His example uses the jDataView library, which adds some nice (but non-standard) methods to the DataView API.
We are going to tackle the ID3v2 spec, so our JavaScript MP3 reader won’t be an apples-to-apples comparison with the Elixir example, but meanwhile we will explore a few more Web APIs!
Let’s set up the Node project:
# Create project directory
$ mkdir mp3-reader && cd mp3-reader

# Init package.json with defaults
$ npm init -y

# Install TextDecoder polyfill
$ npm install --save text-encoding

# Create main file and make it executable
$ touch index.js && chmod u+x index.js
Reading in a File
First off, we need to read in a file. In index.js, we’ll use the core fs library to asynchronously read in the specified MP3 file. This is the only Node specific code—after you read in a file, everything else will work in the browser!
#!/usr/bin/env node
let fs = require('fs');

const file = process.argv[2];

fs.readFile(file, (err, data) => {

});
Since this is an executable file, the first line—called a “shebang”—instructs the shell to execute this script with the Node interpreter. Now we can run it in the terminal:
./index.js fixtures/sibelius.mp3
When we execute index.js, process.argv will look like this:
[ '/Users/jonathan/.nvm/versions/node/v6.10.0/bin/node',
  '/Users/jonathan/projects/mp3-reader/index.js',
  'fixtures/sibelius.mp3' ]
process.argv is an array of at least two items: the full path to the Node executable and the full path to index.js. Any extra arguments passed to our script will begin at index 2, so process.argv[2] will be the path to the MP3 file we should read.
The fs.readFile() method accepts a callback, which will be invoked with an error argument and a Node Buffer object. Buffers have been around for a while, but they are specific to Node—you won’t find Buffers in the browser. However, Node has switched the underlying implementation of Buffer to a standardized JavaScript datatype: ArrayBuffer. In fact, Buffer objects have a .buffer property which returns the underlying ArrayBuffer!
ArrayBuffers are a performant way to store large chunks of data, especially binary data. You’ll find them in graphics APIs like WebGL and in multithreading. Since they’re part of the core language library, you can use ArrayBuffers in both Node.js and the browser!
To grab the Node Buffer’s underlying ArrayBuffer, we can destructure the data argument, which contains a Node Buffer, to extract just its .buffer property:
...

fs.readFile(file, (err, data) => {
  if (err) { throw err; }

  let { buffer } = data;
});
This fancy destructuring syntax is equivalent to let buffer = data.buffer. Now we’re ready to do the actual parsing!
Parsing the ID3 Header
ID3v2 metadata comes at the beginning of the MP3 file and starts off with a 10 byte header. The first 3 bytes should always be the string ID3, followed by 7 more bytes.

The first two bytes after ID3 (bytes 4 and 5) are version numbers. However, we can’t directly access the data in an ArrayBuffer: we need to create a DataView object to “view” that data.
...

const HEADER_SIZE = 10;

fs.readFile(file, (err, data) => {
  ...

  let header = new DataView(buffer, 0, HEADER_SIZE);

  let major = header.getUint8(3);
  let minor = header.getUint8(4);
  let version = `ID3v2.${major}.${minor}`;
  console.log(version);
});
DataViews do not contain the data themselves, but they provide a “window” to “peer” into an ArrayBuffer. This means you can create multiple DataViews for the same ArrayBuffer—a clever design pattern for referencing the same chunk of memory with a different lens.
When creating a DataView, we specify the byte offset of where we want the “window” to start and how many bytes afterwards should be visible. While these two arguments are optional, they prevent us from “peering too far” and will throw useful exceptions if we attempt to access anything beyond these specified boundaries.
To grab the ID3 version numbers, we used the .getUint8() method. This method reads a single byte at the specified position relative to the DataView’s offset. In this case, it reads bytes 3 and 4 relative to an offset of 0.
The ID3 metadata section can be fairly long, so next we need to know the ID3 metadata’s total size (in bytes) so we don’t read too far and begin parsing the actual MP3 audio data.
...

let synchToInt = synch => {
  const mask = 0b01111111;
  let b1 = synch & mask;
  let b2 = (synch >> 8) & mask;
  let b3 = (synch >> 16) & mask;
  let b4 = (synch >> 24) & mask;

  return b1 | (b2 << 7) | (b3 << 14) | (b4 << 21);
};

fs.readFile(file, (err, data) => {
  ...

  let size = synchToInt(header.getUint32(6));
});
Quite a bit going on there! Let's break this down. We read a 32-bit integer (4 bytes) starting at offset 6 (bytes 7–10) of the header that tells us how long the rest of the metadata is. Unfortunately, it’s not just a simple 32-bit integer: it’s a so-called “synchsafe” integer.
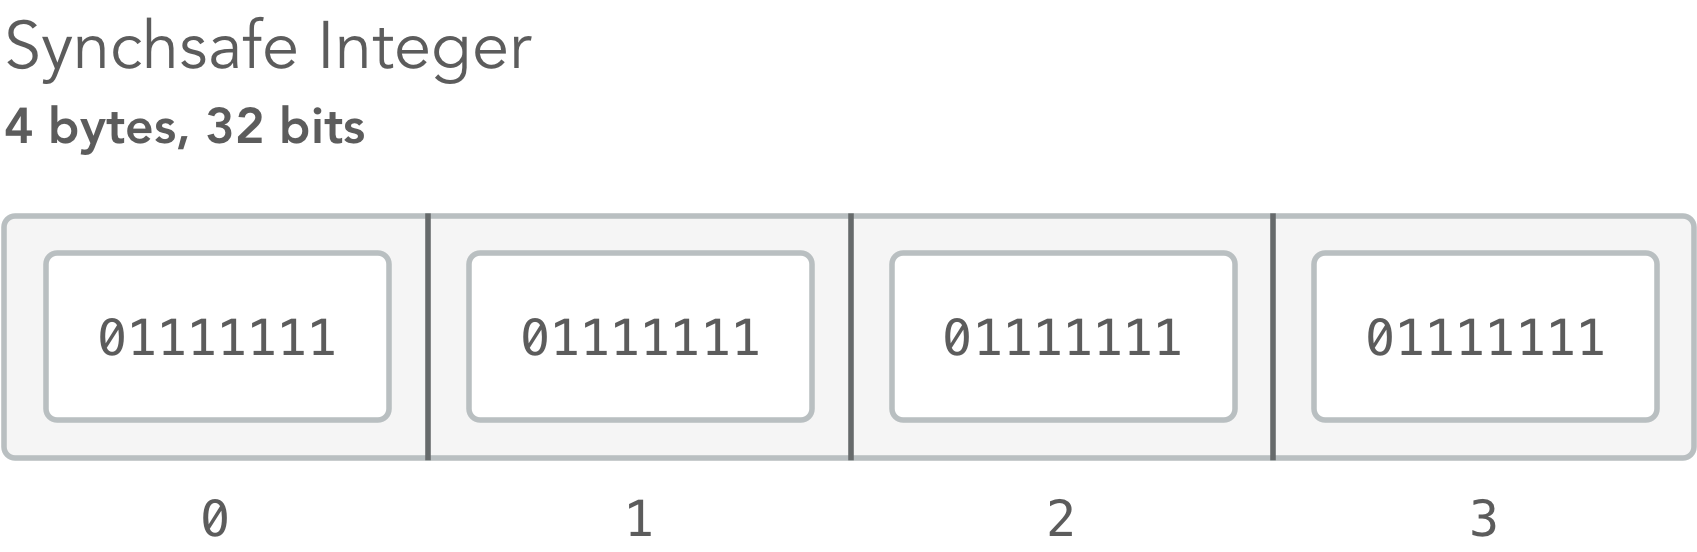
A synchsafe integer is essentially a 28-bit integer with a 0 added after every 7 bits. It’s pretty weird, but luckily we have low level boolean logic at our fingertips: we’ll just break up the synchsafe integer into 4 bytes, then combine them back with the 8th bit of each byte removed.
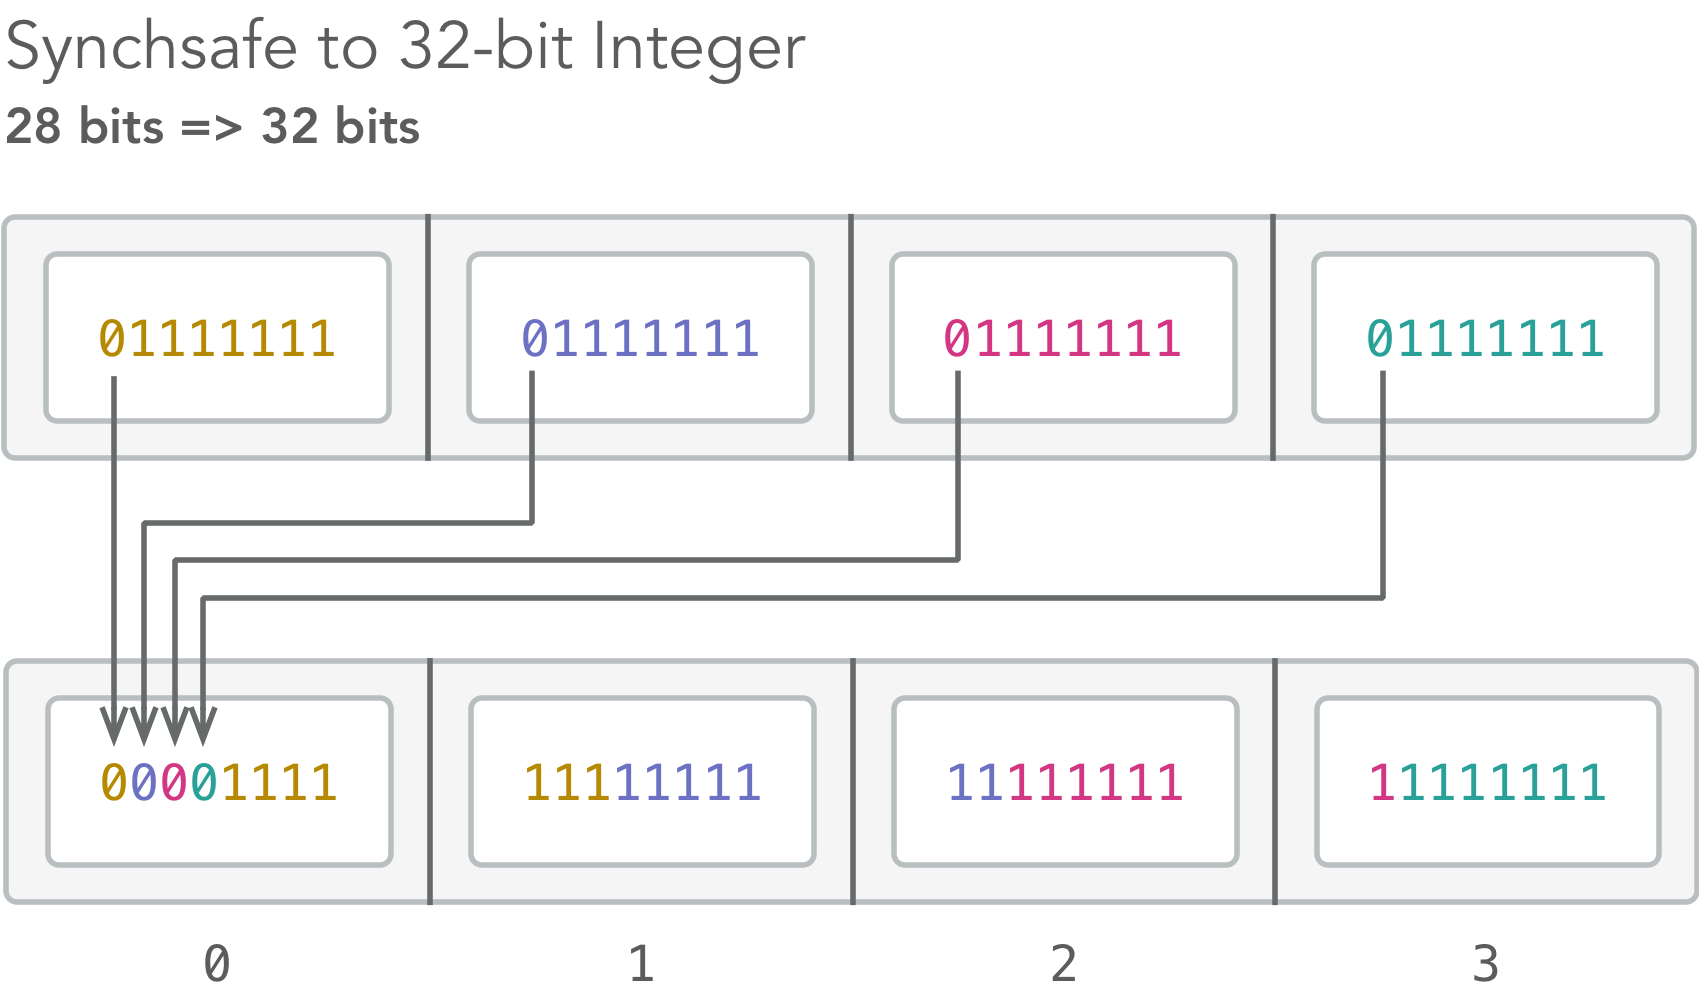
Why doesn’t the ID3 spec just use a regular 32-bit integer? MP3 was designed to be broadcast friendly, so audio players need to be able to play an MP3 from any given spot by watching for the next valid chunk of audio. Each chunk of audio begins with 11 bits set to 1 called the “frame sync.” By using synchsafe integers in the metadata section, this prevents interference with the “frame sync” mechanism. It’s still quite possible to have a sequence of 11 true bits elsewhere, but it’s fairly unlikely and players can easily perform correctness checks.
We’re done reading the 10-byte ID3 header, now it’s time to start looping through the “frames” that come next:
...

fs.readFile(file, (err, data) => {
  ...

  let offset = HEADER_SIZE;
  let id3Size = HEADER_SIZE + size;

  while (offset < id3Size) {

  }
});
ID3 metadata is stored in consecutive chunks called “frames.” Each frame represents a separate key-value pair, like the song’s title or composer. We can read them in by parsing one frame at a time, then skipping by the size of that frame to read the next one until we reach the end of the ID3 metadata. In a moment, we’ll write a function called decodeFrame() to handle this, but if it was implemented we could parse all the frames like such:
...

fs.readFile(file, (err, data) => {
  ...

  while (offset < id3Size) {
    let frame = decodeFrame(buffer, offset);
    if (!frame) { break; }
    console.log(`${frame.id}: ${frame.value.length > 200 ? '...' : frame.value}`);
    offset += frame.size;
  }
});
Parsing an ID3 Frame
Time to implement decodeFrame()! This function should return an object for one frame (key-value pair) structured like this:
{ id: 'TIT2',
  value: 'Snöfrid (Snowy Peace)',
  lang: 'eng',
  size: 257 }
Each frame begins with a 10-byte header, then is followed by the frame’s actual content (the value).
...

let decodeFrame = (buffer, offset) => {
  let header = new DataView(buffer, offset, HEADER_SIZE + 1);
  if (header.getUint8(0) === 0) { return; }
};
After creating an 11-byte DataView (why 11 instead of 10? Hang tight) to inspect the frame’s header, we checked to make sure the first byte isn’t a zero, which would indicate there are no more frames to decode. Many MP3 encoders pad the ID3 metadata section with extra 0s (usually 2048 bytes of “null-padding”) to give audio players like iTunes room to insert more metadata without disturbing the rest of the file.
If the frame doesn’t start with zero, it’s safe to read in the first part of the header: the 4-byte frame ID. Frames are basically a single key-value pair, and the frame ID is the “key” of that pair:

...

let { TextDecoder } = require('text-encoding');
let decode = (format, string) => new TextDecoder(format).decode(string);

let decodeFrame = (buffer, offset) => {
  ...

  let id = decode('ascii', new Uint8Array(buffer, offset, 4));
};
The 4-character frame ID is encoded as an ASCII string, like TIT2 (Title) or TCOM (Composer). To read in multiple bytes at a time, we need a different kind of view called a TypedArray. It’s not a constructor you’ll invoke directly, rather it refers to a class of fixed size homogeneous arrays. So to read in a list of unsigned 8-bit integers, we create a new Uint8Array typed array. If we wanted to read in signed (negative) numbers, we would use the Int8Array constructor instead, but that makes no sense for reading in ASCII bytes.
It’s not enough to fetch an array of 4 bytes—they need to be interpreted, or “decoded,” into a string. Frame IDs map directly to ASCII characters, so we invoked the TextDecoder constructor and its .decode() method to convert the byte array to a string.
Earlier we created an 11-byte DataView starting at the frame’s beginning. After the 4-byte frame ID comes the frame’s size:
...

let decodeFrame = (buffer, offset) => {
  ...

  let size = header.getUint32(4);
  let contentSize = size - 1;
  let encoding = header.getUint8(HEADER_SIZE);

  let contentOffset = offset + HEADER_SIZE + 1;
};
Bytes at indices 4–7 represent the rest of the frame’s size as an unsigned 32-bit integer. We don’t care about the 2 flag bytes which follow, so we are done decoding the frame header. But since it is only 10 bytes long, why did we read in 11? The first byte after the frame header (the 11th byte, index 10) specifies how the frame’s content is encoded, so in a way it is part of the frame header. To compensate for this “extra header byte,” we increased the contentOffset and decreased contentSize by 1.
This “encoding byte” can be set to 0, 1, 2 or 3, and maps to a text encoding like ascii or utf-8. This will help immensely, otherwise we might get gobbledygook if we mistakenly interpreted utf-8 text as ascii.
Decoding Strings
Finally, the frame’s real content begins at offset 11 of the frame. In addition to the encoding byte, some frames are also prefixed with a language descriptor:
...

const LANG_FRAMES = [
  'USLT',
  'SYLT',
  'COMM',
  'USER'
];

let decodeFrame = (buffer, offset) => {
  ...

  let lang;
  if (LANG_FRAMES.includes(id)) {
    lang = decode('ascii', new Uint8Array(buffer, contentOffset, 3));
    contentOffset += 3;
    contentSize -= 3;
  }
};
The language identifier is a 3 letter ASCII string, like eng or deu. Only certain frame types, like COMM (Comments), have a language identifier. Now onward to the real content!
...

const ID3_ENCODINGS = [
  'ascii',
  'utf-16',
  'utf-16be',
  'utf-8'
];

let decodeFrame = (buffer, offset) => {
  ...

  let value = decode(ID3_ENCODINGS[encoding],
    new Uint8Array(buffer, contentOffset, contentSize));
};
We finally grab the rest of the frame and decode the bytestream based on the encoding byte. For example, when encoding is set to 0 we interpret the frame’s content as ascii.
Now we just need to send everything back in a nice package:
...

let decodeFrame = (buffer, offset) => {
  ...

  return {
    id, value, lang,
    size: size + HEADER_SIZE
  };
};
There’s one catch: the frame size didn’t include the 10 byte frame header, so we added HEADER_SIZE to the returned size so the while loop can increment its offset by frame.size to hop to the next frame.
Time to run our script! Find an MP3 file and pass it to index.js. If it doesn’t print out ID3v2.3.0, try another MP3.
$ ./index.js fixtures/sibelius.mp3

ID3v2.3.0
PRIV: ...
TIT2: Snöfrid (Snowy Peace), Improvisation for Reciter, Chorus and Orchestra, Op. 29
TPE1: Lahti Symphony Orchestra, Jubilate Choir, Stina Ekblad and Osmo Vänskä
TALB: Sibelius: The Complete Symphonies - Karelia - Lemminkäinen - Violin Concerto
TCON: Classical
TCOM: Jean Sibelius
TPE3: Osmo Vänskä
TRCK: 38/43
TYER: 2011
COMM: Amazon.com Song ID: 222429669
TPE2: Lahti Symphony Orchestra and Osmo Vänskä
TCOP: 2011 Bis
TPOS: 1/1
APIC: ...
Hey look! We got the special Unicode characters to interpret correctly. Good ‘ol Osmo Vänskä (the conductor) gets his proper accents for free. If the parser was even one byte off, you’d get gobbledygook. Or if you mixed your ID3_ENCODINGS a bit, you might find yourself staring at byte order marks (BOM) and other gunk not-meant-to-be-seen-by-mortals:
ID3v2.3.0
PRIV: ...
TIT2: ǿnöfrid (Snowy Peace), Improvisation for Reciter, Chorus and Orchestra, Op. 29�
TPE1: ǿ﹌ahti Symphony Orchestra, Jubilate Choir, Stina Ekblad and Osmo Vänskä�
TALB: ǿibelius: The Complete Symphonies - Karelia - Lemminkäinen - Violin Concerto�
TCON: ǿ﹃lassical�
TCOM: ǿ﹊ean Sibelius�
TPE3: ǿ﹏smo Vänskä�
TRCK: ǿ︳8/43�
TYER: ǿ︲011�
COMM: ť湧䄀洀愀稀漀渀⸀挀漀洀 匀漀渀最 䤀䐀㨀 ㈀㈀㈀㐀㈀㤀㘀㘀㤀
TPE2: ǿ﹌ahti Symphony Orchestra and Osmo Vänskä�
TCOP: ǿ︲011 Bis�
TPOS: ǿ︱/1�
APIC: ...
Boom! You can download the finished code here.
Encore!
Thanks to the ArrayBuffer, DataView, TypedArray and TextDecoder APIs, you can easily decode binary file formats. Although dealing with file specs can be notoriously tricky, JavaScript’s console-friendly ways make it easy to practice exploratory programming to work out the kinks and off-by-one errors.
If you need a more extensive MP3 metadata parser for your binary libretti, you’ll probably want to use a library like JSMediaTags.
And there you have it! A masterful binary performance of Snöfrid by the JavaScript Symphony Orchestra, conducted by Node.js.
]]>If you choose me, then you choose the tempest.
For the hardy poems of the hero’s life say:
Draw your sword against vile giants,
bleed valiantly for the weak,
deny yourself with pleasure, never complain,
fight the hopeless fight and die nameless.
That is the true heroic saga of life.—Viktor Rydberg
This post first appeared on the Big Nerd Ranch blog.
Want the TL;DR version? Here’s a gist of all three examples.
Async generators and async iteration have arrived! Err, they’ve reached Stage 3, which means they are likely to ship in a future version of JavaScript. Until then, you can enable Stage 3 proposals in Babel to try them out in your own projects.
The web is essentially a decentralized app runtime, so subpar language additions have permanent consequences since future standards must remain backwards compatible. So for a feature to be accepted into the ECMAScript standard, it has to be incredibly compelling—it takes more than snazzy syntax or theoretical elegance for a feature to make the cut.
With that in mind, we should expect async generators and iteration to substantially influence how we architect our future code, yet address a contemporary problem. Let’s investigate how async generators work and examine the challenges of using them in “real” codebases.
Recap: How Async Generators Work
In a nutshell, async generators are like regular generator functions, but they yield Promises. If you aren’t familiar with ES2015 generator functions, check out Chris Aquino’s blog, then watch Jafar Husain’s excellent talk on Async Programming.
To recap, regular generator functions are basically a cross between the Iterator and Observer patterns. A generator is a pausable function that you can “step” through by calling .next(). You can pull a value out of a generator multiple times with .next(), or push a value into the same function multiple times with .next(valueToPush). This dual interface allows you to imitate both an Iterator and Observer with the same syntax!
However, generators have a disadvantage: they must immediately (synchronously) return data when .next() is invoked. Put another way, the code that consumes the data by calling .next() is in control of data flow. This is fine when the generator can generate new data on demand, but generators are not a good fit for iterating over asynchronous (or temporal) data sources, where the source itself controls when the next chunk of data is available.
WebSocket messages are a good example of an asynchronous data source. If we had a list of all the messages we would ever receive, we could iterate over them synchronously. But of course, we can’t know when messages will be received, so we need a mechanism to iterate lazily over messages as they arrive. Async generators and async iteration let us do just that!
TL;DR: generator functions are for data sources where the data consumer is in control, whereas async generators allow the data source itself to be in control.
Simple Example: Generate and Consume an AsyncGenerator
Let’s exercise our async chops with an example. We want to write an async generator function that repeatedly generates a new number after waiting a random number of milliseconds. Over a period of several seconds it might generate five or so numbers starting from 0. Let’s first write a helper function that generates a Promise to represent a timer:
// Create a Promise that resolves after ms time
var timer = function(ms) {
  return new Promise(resolve => {
    setTimeout(resolve, ms);
  });
};
Calling timer(5000) returns a Promise that will resolve in 5 seconds. Now we’re ready to write an async generator:
// Repeatedly generate a number starting
// from 0 after a random amount of time
var source = async function*() {
  var i = 0;
  while (true) {
    await timer(Math.random() * 1000);
    yield i++;
  }
};
So much complexity hiding behind such elegance! Our async generator function waits a random amount of time, then yields the next number in the count-up. If we didn’t have async generators, we could try using a regular generator function to yield Promises like this:
var source = function*() {
  var i = 0;
  while (true) {
    yield timer(Math.random() * 1000)
      .then(() => i++);
  }
};
However, there are some edge cases and boilerplate we’d have to handle, so it’s nice to have a dedicated function type! Now we’re ready to write the consuming code; because we need the await operator, we’ll create an async run() function.
// Tie everything together
var run = async function() {
  var stream = source();
  for await (let n of stream) {
    console.log(n);
  }
};

run();
// => 0
// => 1
// => 2
// => 3
// ...
What magic, and in under 20 lines of code! First, we invoke the source async generator function, which returns a special AsyncGenerator object. Then we use the for await...of loop syntax—called “asynchronous iteration”—to loop over numbers one-by-one as source generates them.
But we can level up: suppose we want to square the numbers generated by source. We could square directly inside the for await...of loop, but it’d be better to “transform” the stream of values outside the loop, similar to using .map() to transform an array of values. It’s quite straightforward:
// Return a new async iterator that applies a
// transform to the values from another async generator
var map = async function*(stream, transform) {
  for await (let n of stream) {
    yield transform(n);
  }
};
Then we just need to add a line to the run() function:
 // Tie everything together
 var run = async function() {
   var stream = source();
+  // Square values generated by source() as they arrive
+  stream = map(stream, n => n * n);
   for await (let n of stream) {
     console.log(n);
   }
 };
Now when we run() everything:
// => 0
// => 1
// => 4
// => 9
// ...
Impressive! But perhaps generating counting numbers isn’t especially innovative.
Medium Example: Write an AsyncIterator for WebSockets
The usual way to respond to incoming WebSocket messages is to attach an event listener:
var ws = new WebSocket('ws://localhost:3000/');
ws.addEventListener('message', event => {
  console.log(event.data);
});
But if we treated WebSocket messages as a stream, it seems natural to “iterate” over messages as they arrive. Unfortunately, WebSockets are not yet async iterable, but we can write our own polyfill in just a few lines. Here’s what our run() function will look like:
// Tie everything together
var run = async () => {
  var ws = new WebSocket('ws://localhost:3000/');
  for await (let message of ws) {
    console.log(message);
  }
};
Now for that polyfill. You may recall from Chris Aquino’s blog series that, for an object to be iterable with the for...of loop, you must define the Symbol.iterator property on that object. Similarly, to make an object async iterable with the for await...of loop, its Symbol.asyncIterator property must be defined. Here’s an implementation:
// Add an async iterator to all WebSockets
WebSocket.prototype[Symbol.asyncIterator] = async function*() {
  while(this.readyState !== 3) {
    yield (await oncePromise(this, 'message')).data;
  }
};
This async iterator waits to receive a message, then yields the data attribute of the WebSocket’s MessageEvent. The oncePromise() function is a bit of a hack: it returns a Promise that resolves when an event occurs, then immediately unsubscribes:
// Generate a Promise that listens only once for an event
var oncePromise = (emitter, event) => {
  return new Promise(resolve => {
    var handler = (...args) => {
      emitter.removeEventListener(event, handler);
      resolve(...args);
    };
    emitter.addEventListener(event, handler);
  });
};
It seems inefficient, but it really tidies up our async iterator. If you have a chatty WebSocket server running at http://localhost:3000, you can watch messages stream in by invoking run():
run();
// => "hello"
// => "sandwich"
// => "otters"
// ...
Hard Example: Rewrite RxJS
Now for the ultimate challenge. Functional reactive programming (FRP) is all the rage in UI programming, and in JavaScript, RxJS is the most popular library for this programming style. RxJS models event sources as Observables—they’re like an event stream or lazy array that can be modified with familiar array idioms like map() and filter().
Since FRP complements JavaScript’s non-blocking philosophy, it’s possible an RxJS-like API will make it to a future version of JavaScript. Meantime, we can write our own RxJS clone with async generators in just 80 lines of code! Here’s the challenge:
- Listen for all click events
- Filter down to only clicks on anchor tags
- Only allow distinct clicks
- Map from click events to a click counter and the click event
- Throttle clicks to once every 500ms
- Print the click counter and event
This type of problem is right in RxJS’s wheelhouse, so we’ll try to replicate its approach. Here’s how we’ll exercise our implementation:
// Tie everything together
var run = async () => {
  var i = 0;
  var clicks = streamify('click', document.querySelector('body'));

  clicks = filter(clicks, e => e.target.matches('a'));
  clicks = distinct(clicks, e => e.target);
  clicks = map(clicks, e => [i++, e]);
  clicks = throttle(clicks, 500);

  subscribe(clicks, ([ id, click ]) => {
    console.log(id);
    console.log(click);
    click.preventDefault();
  });
};

run();
To make this work, we need to write six functions: streamify(), filter(), distinct(), map(), throttle() and subscribe().
// Turn any event emitter into a stream
var streamify = async function*(event, element) {
  while (true) {
    yield await oncePromise(element, event);
  }
};
streamify() is just like the WebSocket async iterator: oncePromise() uses .addEventListener() to listen once for an event, then resolves the Promise. By looping with while (true), we can listen for events indefinitely.
// Only pass along events that meet a condition
var filter = async function*(stream, test) {
  for await (var event of stream) {
    if (test(event)) {
      yield event;
    }
  }
};
filter() only yields events that pass the test. map() is almost identical:
// Transform every event of the stream
var map = async function*(stream, transform) {
  for await (var event of stream) {
    yield transform(event);
  }
};
Instead of testing before yielding, map() simply transforms the event before yielding. distinct() shows one of the superpowers of async generators: they can persist state with local variables!
var identity = e => e;

// Only pass along events that differ from the last one
var distinct = async function*(stream, extract = identity) {
  var lastVal;
  var thisVal;
  for await (var event of stream) {
    thisVal = extract(event);
    if (thisVal !== lastVal) {
      lastVal = thisVal;
      yield event;
    }
  }
};
Last, the mighty throttle() function resembles distinct(): it tracks the timestamp of the last event and only yields it if a certain amount of time has passed since the last yielded event.
// Only pass along event if some time has passed since the last one
var throttle = async function*(stream, delay) {
  var lastTime;
  var thisTime;
  for await (var event of stream) {
    thisTime = (new Date()).getTime();
    if (!lastTime || thisTime - lastTime > delay) {
      lastTime = thisTime;
      yield event;
    }
  }
};
Finally, we need to print out the click event and counter for every event that made it this far. subscribe() is trivial: it just loops over every event and runs the callback, no yields necessary.
// Invoke a callback every time an event arrives
var subscribe = async (stream, callback) => {
  for await (var event of stream) {
    callback(event);
  }
};
And with that, we’ve written our own functional reactive pipeline!
Check out the gist if you want to try out any of these examples.
Challenges
Async generators are pretty awesome. Whereas generator functions allow us to pull data out of an iterator, async generators let us iterate over data that is “pushed” to us. They’re a great abstraction for asynchronous data structures. However, there are some caveats.
First, implementing support for the for await...of on objects is a bit gnarly unless you avoid yield and await. Notably, converting anything with .addEventListener() is tricky because you can’t use the yield operator within the callback:
var streamify = async function*(event, element) {
  element.addEventListener(event, e => {
    // This doesn't work because yield is being
    // called from inside another function.
    yield e;
  });
};
Similarly, you can’t use yield within .forEach() or other functional methods. This is an inherent limitation since there’s no guarantee yield won’t be used after the generator has already finished.
To sidestep this, we wrote the oncePromise() helper. Apart from potential performance issues, it’s important to note that Promise callbacks always execute after the current callstack has finished. In browsers that run Promise callbacks as microtasks, this shouldn’t cause issues, but some Promise polyfills won’t run the callbacks until the next run of the event loop. Consequently, invoking the .preventDefault() method may have no effect since the DOM event may have already bubbled to the browser.
JavaScript now has several asynchronous stream datatypes: Stream, AsyncGenerator and eventually Observable. While all three fall into the continuum of “pushed” data sources, there are subtle semantic differences in how they handle back pressure and control the underlying resource. If you’re interested in the finer facets of functional reactive semantics, check out the General Theory of Reactivity.
More to Come
In the arms race for language features, JavaScript is no slacker. Destructuring in ES2015, async functions in ES2016, and now async iteration enable JavaScript to elegantly tackle the complexities of UI and I/O programming without resorting to the usual unpredictability of multi-threading.
And there’s much more to come! So keep an eye on the blog and the TC39 proposals repo for new goodies. Meantime, you can start using async generator functions in your own code by enabling Stage 3 proposals in Babel.
]]>This post first appeared on the Big Nerd Ranch blog.
You probably knew that despite the name and superficially similar syntax, JavaScript is unrelated to Java. The unfortunate name “JavaScript” originated when the company responsible for creating JavaScript—Netscape Communications—entered into a license agreement with Sun in 1995. Thus, many of the design patterns you might know from Java, Ruby or other class-oriented programming languages are not idiomatic to JavaScript.
So what design patterns are idiomatic to JavaScript?
JavaScript’s object-oriented behavior imitates Self (a dialect of Smalltalk), but the overall programming paradigm is heavily influenced by its functional programming heritage. Moreover, JavaScript has some unique functional patterns of its own hiding in plain sight throughout popular libraries and Web APIs.
Let’s dissect two in-the-wild patterns from the JavaScript ecosystem—we’ll call them the Function Factory Function and Triple Function Sandwich.
Function Factory Function
The Function Factory Function is a function that follows the Factory method pattern, but returns a new function. Most Factories return objects, but thanks to first-class functions in JavaScript, it’s common for the Factory to build a function. In functional terminology, FFFs are often an example of a Higher-order Function.
If you’ve used the Array.prototype.sort function, you probably used a higher-order function to generate another function that can sort a list of objects by a particular property:
var Sorter = extract => {
  return (a, b) => {
    var av = extract(a),
        bv = extract(b);

    return av < bv ? -1 : (av > bv ? 1 : 0);
  };
};

var people = [
  { name: 'Alex', age: 36 },
  { name: 'Beth', age: 30 },
  { name: 'Chris', age: 27 }
];

var sortByAge = Sorter(p => p.age);

people.sort(sortByAge).map(p => p.name);
// => ["Chris", "Beth", "Alex"]
The Function Factory Function follows a similar structure, but unlike a higher-order function, it doesn't require a function as an argument. Here's an example of an FFF used to generate middleware in Koa (a Node.js web framework):
var Koa = require('koa');
var compress = require('koa-compress');
var serve = require('koa-static');

var app = new Koa();

app.use(compress());
app.use(serve('./app'));
If Koa was more OOPsy, calling compress() and serve() would probably generate objects, but in functional programming we can capture local variables as state and return a function with access to those variables. This way, we are still applying the principle of Encapsulation, but without objects!
How would we use the Function Factory Function pattern in our own code? Suppose we are building a Single Page App (SPA) for the next version of Google Docs, and we want to prevent the user from navigating to another document if there are unsaved changes. If the router fired a beforetransition event, it would be nice if we could “lock” the page and make sure the user really wants to navigate away before allowing the transition. We could write a lock() Function Factory Function to tidy this up; here’s how we might use it:
var unlock = lock(ask => {
  if (checkUnsavedChanges() &&
      ask('You will lose changes!')) {
    discardEdits();
  }
});

// ...once this page is no longer around
// and we need to clean up after ourselves:
unlock();
The lock() function generates a new function called unlock() that can be invoked to stop watching for page transitions. This will be useful if the user navigates away from this document and this page needs to be deactivated.
Using lock() can tidy things up nicely: if the user attempts to navigate away from the document, we can check if there are any edits, and if there are we can ask() the user if they are okay with losing changes. If they are, we can discard those edits and move on.
We could implement the lock() function like this:
var $window = $(window);
var lock = cb => {
  var handler = event => {
    var abort = () => {
      event.preventDefault();
    };

    var ask = message => {
      var okay = window.confirm(message);
      if (!okay) { abort(); }
      return okay;
    };

    cb(ask);
  };

  $window.on('beforetransition', handler);
  return () => {
    $window.off('beforetransition', handler);
  };
}
Whenever the user attempts to transition away from the document, we execute the callback and pass in a helper function called ask() to prompt the user. If the user cancels, we .preventDefault() on the event to cancel the transition.
It’s a nice micro API that can tidy up gnarly code elsewhere! This pattern is an elegant alternative to a class-oriented approach where we would attach state and the unlock method to an object. Incidentally, the lock() function is also an example of the next design pattern: the Triple Function Sandwich.
Triple Function Sandwich
Used Promises lately? You’re writing a Triple Function Sandwich!
var promise = new Promise(function(resolve, reject) {
  setTimeout(resolve, 1000);
});

promise.then(() => {
  console.log("It's been a second.");
});
Take a look at all the nested functions: we are invoking the Promise() function by passing it a function that will be invoked and passed yet another function resolve() as an argument. Usually you see this kind of code when a callback needs to be executed asynchronously, but that's not the case for the Promise() function—it will immediately run the given callback:
console.log('1');
var promise = new Promise(function(resolve, reject) {
  console.log('2');
});
console.log('3');

// => 1
// => 2
// => 3
So if the callback isn’t being run asynchronously, why the sandwich? Function sandwiches are a form of cooperative programming: they allow one function to cede control to another function (your callback), but provide a public API for modifying the calling function’s behavior.
We can use this pattern ourselves to create an async-friendly for-loop! Suppose we want to iterate over a list of numbers and print each one-by-one after waiting for a few seconds. Standard loops in JavaScript run as fast as they can, so to wait between iterations we will need to write our own iterate() function. Here’s how we would use it:
var list = [1,2,3,4,5,6,7,8,9];
var promise = iterate(list, (curr, next, quit) => {
  console.log(curr);
  if (curr < 3) {
    setTimeout(next, curr * 1000);
  } else {
    quit();
  }
});

promise.then(finished => {
  if (finished) {
    console.log('All done!');
  } else {
    console.log('Done, but exited early.');
  }
});

// => 1
// => 2
// => 3
// => Done, but exited early.
This example will immediately print 1, then 1 second later it will print 2, 2 seconds later it will print 3 and quit() the loop, and 'Done, but exited early. will be printed. Our callback function receives three arguments to control the loop: curr which contains the current element of the list, next() which advances to the next iteration of the loop, and quit() which exits the loop prematurely.
The iterate() function itself returns a Promise that will resolve once it finishes iterating over the list. This Promise will resolve to true if the loop finished iterating over all the elements, or false if the quit() function was invoked to exit the loop early. Notice the Triple Function Sandwich is not as obvious: the sandwich starts with iterate(), the second argument is a function, and the second parameter of that function, next(), is also a function.
Despite this complex behavior, iterate() only takes a few lines of code to implement!
var iterate = (list, cb) => {
  return new Promise(resolve => {
    var counter = 0;
    var length = list.length;

    var quit = () => {
      resolve(false);
    }

    var next = () => {
      if (counter < length) {
        cb(list[counter++], next, quit);
      } else {
        resolve(true);
      }
    }

    next();
  });
};
iterate() initializes a counter variable, defines a few functions, then kicks off iteration by calling next(). Every time next() is invoked, it executes cb() and passes in the current element, next() itself, and the quit() function. If it has finished iterating, it resolves the overall Promise to true.
If we had written this same code in a more OOPsy style, it might look like:
var Iterator = function(list, cb) {
  this.list = list;
  this.cb = cb;
  this.counter = 0;
  this.length = list.length;
  this.promise = new Promise(
    resolve => { this.resolve = resolve; }
  );
};
Iterator.prototype.quit = function() {
  this.resolve(false);
};
Iterator.prototype.next = function() {
  if (this.counter < this.length) {
    this.cb(this.list[this.counter++]);
  } else {
    this.resolve(true);
  }
};
Iterator.prototype.start = Iterator.prototype.next;

var list = [1,2,3,4,5,6,7,8,9];
var iterator = new Iterator(list, (curr) => {
  console.log(curr);
  if (curr < 3) {
    setTimeout(() => iterator.next(), curr * 1000);
  } else {
    iterator.quit();
  }
});
iterator.start();

iterator.promise.then(finished => {
  if (finished) {
    console.log('All done!');
  } else {
    console.log('Done, but exited early.');
  }
});
Looks a little clumsy in comparison. Both versions solve the same problem with a form of cooperative programming: the former by encoding state in local variables and “pushing” in a public API to the callback, and the latter by creating a special object with state and methods. Interestingly, this example shows that Encapsulation is not just an OOP principle—the functional approach also hides its state (local variables) and provides a public API for modifying that state.
The Triple Function Sandwich is not just for async programming! If you find yourself resorting to an object-oriented approach when you need to break down a function into several steps while preserving state, you might just try a bite of the Triple Function Sandwich. Both approaches provide encapsulation and solve cooperative programming problems, but the functional approach is a thing of beauty that does credit to JavaScript’s hidden elegance.
]]>This post first appeared on the Big Nerd Ranch blog.
In Part 2, we continue down the rabbit hole of web optimization. Make sure to check out Part 1 for background on the metrics we’ll be investigating!
How do we level up?
Although our site was certainly not slow (thanks to the static build), several metrics showed it could benefit from web optimizations.
| Page | PageSpeed Score |
|---|---|
| https://www.bignerdranch.com/ | 61/100 |
| https://www.bignerdranch.com/blog/ | 56/100 |
| https://www.bignerdranch.com/work/ | 65/100 |
Our top three pages were hefty for a site that's primarily text-based:
| Page | Total Page Weight |
|---|---|
| https://www.bignerdranch.com/ | 1.7 MB |
| https://www.bignerdranch.com/blog/ | 844 KB |
| https://www.bignerdranch.com/blog/any-blog-post/ | 830 KB |
A total page weight of 1.7 MB for the homepage could negatively impact our mobile users (an ever-growing audience), especially for those browsing on their data plan.
What Did You Do?
Blocking resources like scripts and stylesheets are the primary bottleneck in the critical rendering path and Time-To-First-Render, so our first priority was to tidy up blocking resources. We audited our usage of Modernizr and found we were using only one test, so we inlined it. As for the blocking stylesheet, we just minified it with Sass’s compact mode for a quick win. With those changes, we reduced the “blocking weight” by 33% across all pages.
So what? The faster blocking resources are downloaded (and stop blocking), the sooner the page will be rendered. That will significantly reduce Time-To-Visual-Completeness.

Images
Next, to speed up Time-To-Visual-Completeness, we targeted the size and number of non-blocking requests, like images and JavaScript. We used image_optim to losslessly shrink PNGs, JPEGs and even SVGs; since images are our heaviest asset, this cut down size dramatically (sometimes as much as 90%) by taking advantage of LUTs and nuking metadata. The homepage banner was particularly large, so we opted for lossy compression to cut the size in half. The quality difference is almost unnoticeable, so it was a worthwhile tradeoff.
JavaScript
Script optimization took a little more thoughtfulness: we were already minifying scripts, but different pages loaded up to five files (libraries and “sprinkles” of interactivity). jQuery and its host of plugins comprised the largest payload, so we scoured Google Analytics to determine which versions of Internet Explorer we needed to support.
IE9 and below accounted for 5% of our traffic on top pages, but on pages that depended on jQuery (those with forms like our Contact page), IE9– made up less than 4% of traffic (only a fraction of those visitors used the form). Armed with these statistics, we opted to support IE10+ with jQuery 2. Still, this only shaved 10 KB, and jQuery’s advanced features were really only used by forms.
However, by dropping IE9– support, we were able to drop Zepto.js into all our pages. At 25 KB, Zepto is tiiiny; the remaining pages with forms pull in jQuery 2, but all other pages can opt for the economical Zepto library instead.
Our own JavaScript got some tidying: latency was the limiting reagent for our (very small, <6 KB overall) scripts, so we opted to concatenate all our JavaScript into a single script. We also made sure to wrap all the files in an IIFE to help the minifier tighten up variable names. In the process, we discovered some unnecessary requests, like blog searching and external API calls.
HTML
For completeness, we added naïve HTML minification. To get the most out of this step, you should use a whitespace-sensitive templating language like Slim or Jade. Still, with GZIP compression enabled, the win was minor and made economical sense only because it was a quick addition.
Server tweaks
After optimizing actual resource size, static servers like Apache and Nginx can help further reduce over-the-wire size and the number of requests.
We enabled compression (DEFLATE and GZIP) for all text-based resources:
<IfModule mod_deflate.c>

  # Force compression for mangled headers.
  # http://developer.yahoo.com/blogs/ydn/posts/2010/12/pushing-beyond-gzipping
  <IfModule mod_setenvif.c>
    <IfModule mod_headers.c>
      SetEnvIfNoCase ^(Accept-EncodXng|X-cept-Encoding|X{15}|~{15}|-{15})$ ^((gzip|deflate)\s*,?\s*)+|[X~-]{4,13}$ HAVE_Accept-Encoding
      RequestHeader append Accept-Encoding "gzip,deflate" env=HAVE_Accept-Encoding
    </IfModule>
  </IfModule>

  # Compress all output labeled with one of the following MIME-types
  # (for Apache versions below 2.3.7, you don’t need to enable `mod_filter`
  #  and can remove the `<IfModule mod_filter.c>` and `</IfModule>` lines
  #  as `AddOutputFilterByType` is still in the core directives).
  AddOutputFilterByType DEFLATE application/atom+xml \
                                application/javascript \
                                application/json \
                                application/rss+xml \
                                application/vnd.ms-fontobject \
                                application/x-font-ttf \
                                application/x-web-app-manifest+json \
                                application/xhtml+xml \
                                application/xml \
                                font/opentype \
                                image/svg+xml \
                                image/x-icon \
                                text/css \
                                text/html \
                                text/plain \
                                text/x-component \
                                text/xml

</IfModule>
Since we enabled cache busting (e.g. main-1de29262b1ca.js), we bumped the Cache-Control header for all non-HTML files to the maximum allowed value of one year. Since the filename of scripts and stylesheets changes when their contents change, users always receive the latest version, but request it only when necessary.
<IfModule mod_headers.c>
  <FilesMatch "(?i)\.(css|js|ico|png|gif|svg|jpg|jpeg|eot|ttf|woff)$">
    Header set Cache-Control "max-age=31536000, public"
  </FilesMatch>
</IfModule>
Show Me the Numbers!
We expected dramatic improvement across various metrics after enabling GZIP and aggressive caching. With blocking scripts nuked from the head, Time-To-Visual-Completeness should drop to within our 2-second goal.
Page weight
Sizes are of GZIPed resources.
| Page | Resource type | Before | After | Percent |
|---|---|---|---|---|
| All | Blocking (JS/CSS) | 21.2 KB | 14.7 KB | 31% smaller |
| https://www.bignerdranch.com/ | Scripts | 39.8 KB | 11.9 KB | 70% smaller |
| https://www.bignerdranch.com/ | Images | 1.1 MB | 751 KB | 27% smaller |
| https://www.bignerdranch.com/blog/ | All + search | 844 KB | 411 KB | 51% smaller |
| https://www.bignerdranch.com/blog/any-blog-post/ | All | 830 KB | 532 KB | 36% smaller |
We cut our average page weight in half!
Google PageSpeed score
Scores are for mobile platforms.
| Page | Before | After | Improvement |
|---|---|---|---|
| https://www.bignerdranch.com/ | 61/100 | 86/100 | +25 |
| https://www.bignerdranch.com/blog/ | 56/100 | 84/100 | +28 |
| https://www.bignerdranch.com/work/ | 65/100 | 89/100 | +24 |
We addressed all high-priority issues in PageSpeed, and the outstanding low-priority issues are from the Twitter widget. On desktop, our pages score in the mid-90s.
WebPageTest
Bolded links indicate repeat visits to the page (caching performance).
| Page | Total Load Time | Time To First Byte | Time To Visual Completeness |
|---|---|---|---|
| https://www.bignerdranch.com/ | 2.185s | 0.210s | 1.996s |
| https://www.bignerdranch.com/ | 1.314s | 0.573s | 0.669s |
| https://www.bignerdranch.com/blog/ | 2.071s | 0.188s | 0.696s |
| https://www.bignerdranch.com/blog/ | 0.850s | 0.244s | 0.371s |
| https://www.bignerdranch.com/work/ | 2.606s | 0.395s | 1.088s |
| https://www.bignerdranch.com/work/ | 0.618s | 0.207s | 0.331s |
TTFB tends to be noisy (ranging from 200 to 600 milliseconds), and thus Total Load Time varies drastically. However, the most important metric, Time-To-Visual-Completeness, is now consistently under 2 seconds for new visitors on all pages. And thanks to more aggressive caching, repeat visitors will wait less than half a second to view the latest content.
That’s a Wrap
The results of the audit proved delightful: we cut the average page weight in half and significantly improved the Time-To-Visual-Completeness. In the future, we will be evaluating other optimizations for bignerdranch.com:
- Inline core CSS styles: our stylesheet still blocks the parser, but inlining can complicate source code.
- Switch to Autoprefixer and Clean CSS instead of relying on Sass’s compact mode.
- Serve assets over CDNs or inject proxies to optimize delivery.
- Use SVG sprites for various logos, like social media icons.
- Switch to Nginx from Apache. Nginx is compiled with modules, so it tends to use less memory and is better with heavy traffic. Since our site is static, the server is the limiting reagent in TTFB.
- Enable SPDY and HTTP2 to further cut down latency with request multiplexing.
mod_pagespeedto automate CSS inlining and other improvements.- Speedier Node-based build. Jekyll greatly improved our internal publishing process, but we’ve felt some major architectural frustrations. We foresee bringing our expertise with Node-based pipelines to our internal build process.